
15% OFF PATTERN ORDERS OF $30 OR MORE – USE CODE: 15%OffOver30

How to Make Paper Mache – The 5 Basic Steps

This is a reader-supported site. When you buy through links on this site, I may earn an affiliate commission . Thanks for your support! :)
If you want to know how to make paper mache, this post is for you.
Paper mache (or papier-mâché, if you prefer to say it with a French accent) :) ) is a versatile sculpting material for artists of all ages. It’s a fun way for kids to create their first sculptures, but it can also be used to create museum-quality works of art – and anything in between. (To see some of the paper mache art that our readers have submitted, click here .)
Teachers and parents : If you need a printable PDF copy of this post click the button below and then save the file to your device:
Table of Contents
All paper mache projects start with these basic steps:.
- Create an armature for your sculpture, or find an object that has the shapes you want for your project.
- Make some paste , or mix up some paper mache clay . (I show you how to find the free recipes below).
- Apply the paper mache to your form.
- Allow the paper mache to dry all the way through.
- Use acrylic paint to decorate your paper mache sculpture and seal your sculpture with acrylic varnish.
Step 1: Creating a Form or Armature
Wet paper stuck together with paste has no particular form of its own, so the real sculpting happens when you build your armature. Take your time with this step, because it’s important.
Many of the sculptures on my site were made using a cardboard pattern inside. I don’t go into that here, but if you’d like to try that method, you can see how the patterns are made here .

For a really fast way to make paper mache sculptures and masks, choose one of my patterns for paper mache . The downloadable templates create all the shapes for you – just add paper mache and paint!
Armatures Made with Crumpled Paper and Masking Tape:
For years I created my animal sculptures with crumpled paper and masking tape.
That’s how this little dragon was made. Newspaper was crumpled into the shapes of the body, legs and head, and then held together with masking tape.

Armatures Made with Crumpled Foil and Hot Glue:
To get even more detail in your armature, you can use crumpled foil held together with hot glue. This method is a little more expensive, and the glue gun can burn you if you aren’t paying attention.
However, if you’re careful it can be a lot easier to make an armature with foil instead of crumpled paper. The paper tries to un-crumple itself while you’re getting the tape off the roll. The foil doesn’t do that, so it’s easier to use.
If you’re going to cover your foil form with paper strips and paste, you’ll need to cover the foil with masking tape, first. The paste doesn’t like to stick to foil. However, if you’re using paper mache clay, no masking tape is needed.
This little owl was made with a foil armature:

Paper mache owl armature made with foil.

How the little owl looked after he was covered with paper mache clay and painted. This is a great project for beginners – you can see the tutorial here.
Using Found Objects for a Form for Paper Mache:
Many paper mache items can be made over objects you find around the house. This paper mache bowl was made using a small ceramic bowl for the form. Our friend Rex Winn uses plastic bags to make the forms for his pumpkins , and many people make masks using milk jugs or paper plates.

Using paper mache clay, made with colored tissue paper, to make a bowl.

The finished paper mache bowl, after it dried. You could do the same thing with paper strips and paste, and then paint it.
Paper Mache Over a Clay Model:
Gerda left a comment to remind us that you can use clay to sculpt a form, and then cover the clay with paper mache, like I did when I made my African Mask , and when I made a strange helmet mask years ago. (That video isn’t very good, but I really like the mask. :) )

Make your form first, with clay, and then cover it with plastic wrap.

Then cover the form with several layers of paper mache. I used brown paper to use as a base for the final painting. Always varnish your paper mache sculptures and mask after the paint is dry, to seal out moisture.
Paper Mache Over a Wire Armature:
Patricia mentioned that she often makes armatures with either chicken wire or aluminum mesh. It’s traditional to make paper mache parade floats with a chicken wire form, but I’ve never tried using it myself. Patricia points out that large sculptures made that way are very light because they’re hollow.
Aluminum mesh is a really good armature choice for large flat areas, like elephant ears or the wings on my big dragon , that might warp if you used cardboard covered with paper mache.
Scroll down to the comment area to see Gerda and Patricia’s comments.
Step 2: Make Your Paper Mache
You can cover your form with paper strips and paste, or with a mixture of pulped paper that has been mixed with some kind of binder or glue.
Paper mache clay:
On this site, many of the projects use paper mache clay, a mixture I invented that contains soaked paper, Elmer’s glue, drywall joint compound, and oil. You can find the printed recipe (and many variations for it) on this page.
Watch this video to see how the original paper mache clay recipe is made:
Paper mache paste:
For the more traditional way to make paper mache, you’ll use paper strips and some form of paste to apply the paper strips to your armature. The easiest paste recipe is just flour mixed with warm water.
You can see how easy it is to mix in this video:
Many people worry about mold if they use a paste made with flour and water. This can be a real problem if the paper mache doesn’t dry quickly.
However, mold can’t grow without water, so make sure your sculpture dries fast, and then seal it with varnish so it can’t absorb water from the air.
Watch this video to see how to keep mold from ruining your sculpture.
Another (minor) problem is that you’ll need to make a new batch of the flour and water paste every day, because yeast from the air tries to turn it into sourdough starter. When that happens, the paste doesn’t smell very good and it isn’t as sticky.
Flour and water paste doesn’t cost much, though, so just throw it out at the end of your sculpting session, and start with a new batch in the morning.
Paste with no flour (and no mold!):
A really good alternative to home-made paste used to be Elmer’s Art Paste, but they don’t make it anymore. In fact, that’s what I used for the African mask that I made over a clay form. However, there is an alternative to the art paste, that is also gluten-free, and it will never attract mold. It’s called methylcellulose, and I have a video showing how to use it here. You can store it in a jar on your shelf for months, but remember to mix it before using it again.
Methylcellulose is a great paste to use in a classroom, because a 2 ounce carton makes up an entire gallon of paste that you can keep using for months without it going bad.
Methylcellulose isn’t thick, like traditional paper mache paste, but it is still really sticky. If you’re teaching kids how to make paper mache sculptures, or if you live in a hot, humid climate where nothing ever seems to get dry, that’s the paste you’ll want to use.
Make paper mache with glue:
A lot of people like to use Elmer’s Glue-All or Elmer’s School Glue for paper mache. Mix it with a little water before using it. That helps soften the newspaper so it will lie down flat on your form.
You can also use Titebond Wood Glue, for a really strong, fast-drying paper mache.
Be sure to see this page for more recipes and videos for paper mache paste.
Step 3: Apply the paste or paper mache clay to your form.
Applying paper mache clay:.
To use the paper mache clay, just mix it up and apply it over your armature with a knife. It’s a lot like frosting a cake, but you’ll want to use a very thin layer so it can dry quickly. The Egyptian Blue Hippo below was made with a foil armature covered with a very thin layer of paper mache clay.

A paper mache copy of the famous Egyptian Blue Hippo, made with foil and paper mache clay.
You can find many tutorials for animal sculptures made with paper mache clay on this page, and in my book Make Animal Sculptures with Paper Mache Clay .
Applying paper strips and paste:
You’ll want to use paper that’s soft enough to bend over the curves of your form. You also need to tear off all the cut edges, because they will show as straight lines on the finished sculpture. The torn edges kind of melt into the shapes, so they look better.
There are some tricks to getting the paper strips to lie down flay (or should I say “ lay down flat?” I don’t think I ever get that right! :) ) You can see some tips for applying your paper mache in the video below:
Step 4: Let your paper mache get dry all the way through.
The one biggest mistake people make with paper mache is not letting it dry long enough before painting it. If you seal any moisture inside, there’s a very good chance that mold will start to grow. You’ll eventually see it as dark spots on the outside of your sculpture, and at that point there’s very little chance of saving it.
So give your sculpture plenty of time to dry! Paper mache is not an ‘instant’ sculpting material. Here’s a video that talks about how long it will take for your paper mache project to dry:
Step 5: Paint it!
This is the exciting step that brings your paper mache sculpture to life.
I often use an acrylic gesso before I paint my sculptures, because it seals the paper mache and gives you a nice white surface to paint on. It seems to make the colors brighter, and you don’t need as much paint to achieve the look you want.
However, I have painted a lot of sculptures without gesso, so it’s really optional.
I always use acrylic paint, but you might want to experiment with oil paint or watercolors .
When your paint is dry, be sure to seal it and protect the paint with a coat of acrylic varnish. I love using the Deco Arts Ultra Matte varnish, because I don’t like a gloss varnish on my animal sculptures.
However, there are many types of sculptures or decor objects that look best with a shiny varnish, so choose the one that will give you the look you want.

Now Your Paper Mache Sculpture Is Done!
Be sure to show it off on the Daily Sculptors page so we can all see how it came out. After all that work, you deserve to brag a little! :)
Related Posts:

Jonni’s Favorite New Recipe for Paper Mache Clay

Cooked Paper Mache Paste Recipe

Patterns for the Lion King Jr Headdress Masks
32 thoughts on “How to Make Paper Mache – The 5 Basic Steps”
Walmart doesn’t seem to carry Proform joint compound any longer. After DAP — which won’t work — it seems like the brands most readily available is USG or Wurth. Are you aware of any problems with those brands? Thank you for the information. I’m very eager to try this recipe as I’d like to be able to smooth the sharp edges on the masks.
USG works really well. I was able to get Wurth to work by substituting Gorilla wood glue for the Elmers – but someone recently told me that it was lumpy when she tried it. So I’d stick with the USG brand if you can find it. In fact, I just bought some a few days ago at Lowes.
I think my question is probably a travesty to your art form, judging from all the information and comments I see…
I used paper mache to make a mold of the inside of a bowl. Its purpose is to serve as a sort-of dressmaker’s dummy so I can accurately sew a fabric lining for the bowl. I don’t intend to keep the mold beyond its intended use.
Here’s my question: I lined the bowl with paper mache about one-and-a-half to two inches thick. Of course, I didn’t exactly know what I was doing; I thought it would dry within a 24-hour period. It seems I was sadly mistaken. But I lined the bowl with a very thin piece of plastic first, so there’s no air getting to the core of the paper mache other than through the top surface. I wondered if it would trash the mold if I lifted it out of the bowl, peeled the plastic off, and turned it upside down so it could air-dry a bit faster. Does that seem like a good idea or not?
Hi Minerva. I have never made anything with paper mache that thick. In fact, I never use a layer over 1/4″, and usually start with a layer that’s even thinner than that. Paper really likes to hold on to water, and mold spores will move in quickly, as long as there’s any moisture at all. I think your only option is to pull the paper mache out of the bowl and turn it upside down on a sheet pan. Use foil or parchment paper to keep it from sticking to the pan – and remove the plastic wrap, of course. “Bake” it at 250° F to dry it out, and if your oven has a fan, be sure to turn it on. Even with it in the oven, it will still take many hours to dry all the way through. It will dry on the outside first, of course, so I don’t know how you’ll test it to make sure there’s no moisture deep inside, but if you’re only using it temporarily, that might not matter, as long as you can get it dry enough for your project. Good luck with it!
So I took your advice and pulled my mold out of the bowl. It seemed sturdy enough to do that without making it collapse. I then peeled the plastic off; it came off easily. Since the very top surface of it was pretty dry already, I just flipped it upside down, sat it on a small box on the floor, and turned a floor fan on it (at low speed). The drying seems to be moving along at a good pace. Luckily, I’m not in a big hurry, or I would have used your oven idea, too. Thanks for your help.
Am about to start putting paper Mache on my bear. The bear is covered in newspaper and masking tape. Can I lay the paper Mache right on top of this or do I need plastic bag or aluminum foil first?
You would only need the plastic bag or foil if you want to remove the dried paper mache from your form. Otherwise, just put your paper mache directly over the newspaper and masking tape.
I found your youtube videos on paper mache recently and I love them! Your pieces are amazing! I’m also a fan of paper mache and I’m currently working on a project for Halloween. In your posts and videos, you say that you just use paper, but is it a thicker paper? It’s brown and it looks almost like thinner cardboard. I’m curious because, in the past, I would use newspaper, but for this project, I know I wouldn’t have enough so I bought and am using butcher paper. I read that it’s a little stronger. But, my current project is very large and it still seems flimsy after two layers. Do you think I would just have to add more layers for strength? Thanks so much!
Hi Megan. The brown paper I often use is about the same weight as newspaper, but it’s easier for me to see the shapes without all the print. I get it from amazon and walmart shipping boxes. You can use the heavy brown paper used for paper bags, but it’s stiffer so it’s harder to make the paper mache smooth. I almost always have something under my paper mache, like an armature or one of my lightweight cardboard patterns. If your paper mache won’t have any support, it will probably need more layers. You might even want to try the Titebond III wood glue instead of paste, to make your project stronger. I have a video about it here .
You’re awesome! Thanks for the quick response! Great! Maybe next time I’ll try the brown paper but I guess the butcher paper will have to do. I do have an inflatable ball underneath to hold the structure. I did find your video on using Tite Bond III before I started and it’s working great! Thanks for all your help! I wish I could send you a picture to show you what I’m working on, but any way, have a great holiday season!
We would love to see it when it’s done! You can show off your work on the Daily Sculptors page . :)
Hi, I am absolutely living your videos! Thank you so much for sharing all of them! My question to you is, can you use this paste on cardboard? I made a “vase” from cardboard and was going to use strips, but then thought I’d your clay. Would that work? Thank you, Amy
Hi Amy. Yes, you can use the paper mache clay over cardboard. We do it all the time. Try to use a thin layer, so it can dry all the way through. And have fun. :)
After it dries, can you add more to it the next day?
Yes, we do that all the time. :)
Hi Jonni! I was wondering if the paper mache clay sticks to duct tape? Thanks, Kim
Hi Kim. I put duct tape on my big dragon , although I can’t remember why. The paper mache clay did stick to it. I can’t remember what brand of tape I used, though. You might want to do a small test to make sure it will work with the tape you have.
Does paper mache stick to plastilina clay? I have a sculpt ready to add paper mache to bu don’t know if I need to cover with petroleum jelly or not.
In my experience it’s a lot easier to get the dry paper mache off the plastilina clay if you use the petroleum jelly. It doesn’t seem to hurt the clay, but I suppose it might make it slightly softer.
Thank you, dear Jonni for this very useful and thorough tutorial! In the future I will pay more attention to my armatures! Though, I once made an orc head which was hollow, it didn’t need an armature, because I first made the head from real clay and used that as a mould which I covered with paper strips and paper mache clay. When it had dried thoroughly, I had to cut the head in halves to remove it from the mould, then glued the halves together and gave it another layer of paper m. clay. Then I painted and varnished it. It was a very strong head!
Do you have a photo of your Orc head, by any chance? We would love to see it ! :)
Hi, Jonni, yes I have, and I did show it to you a few years ago. Do you want me to post it in the group where people show their art works? If so, please tell me how I should do that.
P.S. I found the place (Daily Sculptors, I think it was), but I don’t know if the photo got uploaded.
Hi Gerda – I’m glad you found it. Your photo did upload, but the posting isn’t automatic, so it often takes several hours for them to show up. You can now see your post here . Thanks for showing it to us!
That would be great! The only work we have of yours that can be found with the search bar is your Witcher’s Head Dress (which is fabulous, by the way). You probably showed us your Orc through the old system that put images in comments. The search system doesn’t find things in comments, and there are over 40,000 comments on this site, so nobody reads them all. If you post it again on the new form, people will actually be able to find it. :)
Just go to the Daily Sculptors page and hit the yellow button to find the form. I edited the post, by the way, to include your tip about using clay as a form for paper mache. I’ve done it many times myself – I don’t know why I forgot. Thanks so much for reminding me!
Very helpful tutorial. I learned how to do paper mâché using chicken wire or a much smaller gauge screening to build my basic shapes. You use way less material since a rounded body shape would be hollow and the screen/wire is very bendable. I cover with paper strips and then add your paper mâché clay recipe for detail. It is just recently I’ve started using cardboard armature and filling in with foil. I guess there are many ways to achieve your desired shape. I just thought I’d add this idea. I love your work and site. It is wonderful!
Pat, I have never used the chicken wire method, (the sharp points of the cut wire scare me because I’m a big chicken…) but I know a lot of people do it that way. Have you have ever taken progress photos of one of your projects? If you have, would you be interested in writing a guest tutorial for the blog? I’d really like to see how you do it. You might even convince me to give it a try. :)
Jonni, more than chicken wire, I use a finer grade hardware cloth most of the time. I’ll have to check and see if I have any pics of a piece in progress. I think all I have is one already covered in paper strips. I also don’t use a pattern. I just wing it and it works for me. If you check my website, you’ll see that the pieces come out looking pretty good I think. I will check and see if I have a photo of a piece in progress and let you know.
Dear Patricia, I have visited your website and I really love your artworks! Your animals are made with humor, and they are also touching. Thank you for showing them! Kind regards, Gerda Quist.
Thank you so much Gerda. That means a lot to me.
Hi can you use something to put over the paper mache statues for outside use?
Very thorough tutorial! I agree with the first first and most important step being armature. I have a tendency to underthink that part and end up kicking myself later.
Leave a Comment Cancel reply
Save my name, email, and website in this browser for the next time I comment.
Notify me of followup comments via e-mail. You can also subscribe without commenting.
Affiliate Disclosure – Privacy Policy – Cookie Policy – Shipping and Refund Policy

FREE PRINTABLE DOWNLOAD:
"5 best recipes for paper mache".
Includes Jonni’s famous Paper Mache Clay recipe, and tips on choosing the right recipe for your next project.
The Graphics Fairy
Vintage Images, DIY Tutorials & Craft Projects

Paper Mache Beginner’s Guide (Easy!)
Written by Rebecca E. Parsons
This post may contain affiliate links which won’t change your price but will share some commission, you can find our privacy policy here.
Paper Mache Beginner’s Guide
Hello my sweet Graphics Fairy friends! It’s Rebecca E. Parsons here, back today with a fun tutorial for a Paper Mache Beginner’s Guide! Paper Mache is a marvelous art form for beginners because people of all age groups can enjoy the simple applications of this technique without any prior experience. In this tutorial, we will make a nifty little Paper Mache Bowl using an inflated balloon as a mold. I’ll even included 2 recipes for the mixture you will need, one is a flour paste recipe and one for water and glue paper mache. Easy peasy! Plus we will decorate the inside of our bowl with a beautiful Graphics Fairy bird!

What is Paper Mache?
In simple terms, paper mache refers to the layering of paste moistened paper onto a blank surface. The paper then dries into the shape of that blank surface. Cool! The term paper mache is derived from the French words Papier-mâché, meaning of all things “chewed paper.” Paper mache is a method of crafting in which paper is combined with a ‘paste’ to create a wide variety of objects.
Don’t forget to Pin and save this post for later!

You can create something as simple a little bowl to something as grand as a Mardi Gras float and even a useable canoe! This age old craft dates back thousands of years to Egypt and China.

Materials Needed
The basic materials needed for paper mache crafting include:
- Newsprint Paper (I prefer blank newsprint, but you can use old printed newspapers as well)
- An Adhesive (see options below)
- Vaseline (for highly detailed molds)
How to Make Paper Mache
There are two options for preparing your paper for paper mache. One method uses paper pulp created by placing paper scraps into boiling water or soaking the paper in water overnight, then mixing in an adhesive. This is best for sculpting and intricate designs. The most commonly used method requires tearing strips of paper, soaking them in paste or adhesive, then laying them on a shape. The adhesive used to moisten the paper acts as the binding agent. The outer shell hardens as the paper dries. After drying, your paper mache creation can be painted and decorated. We will be using the ‘strips of paper’ method in our crafting.
A soft paper that is easy to mold is the best option for paper mache. Although different types of paper can be applied, torn strips of newspaper is the definitive choice for most crafters. It is inexpensive; free if you use old newspapers! It is very absorbent and thin. I actually buy unprinted newsprint that is used as packing paper when moving. TIP : Make sure that it is uncoated. I prefer this because newspaper ink stains the piece. That is fine however if you plan to paint it.
As always, I encourage you to experiment. You can use lightweight papers like 20-24 lb. printer paper. Just make sure that you soak them a little longer so they absorb the glue. I have heard of people using cotton or rag papers with success as well. Those would be pricey though. NOTE : Coated and glossy papers like magazine pages will not work!

The Adhesive
Crafters have two choices for the adhesive:
- Homemade Flour Paste : A part water, part flour mix. There isn’t really an exact flour to water ratio, but 1 cup flour to 1 cup water is a good reference point. It is best to use a whisk and bowl to create the flour based paste.
- Ready-made Glue Mix : Plain white school glue (PVA glue like Elmer’s) mixed with water is very popular. Wood glue can also be used. White PVA school glue should be mixed 2 parts glue to 1 part water. A 4 ounce bottle is mixed with 1/4 cup of water.
The use of glue is similar to using flour, but glue produces a stronger structure and is less likely to deteriorate over time.
Salt : I recommend use of salt for preventing future mold on your paper mache project. It also speeds up the drying process by removing excess moisture from the paper more quickly. It is optional, of course.
Advanced Paper Mache
Three-dimensional paper mache sculptures can be created by starting with foam core board that you can cut to form whatever your imagination leads you to. Whether it be a face, birds, flowers, etc., the options here are virtually limitless. Wire can also be utilized as a reinforcement tool or by itself to actually build the ‘skeleton’ for a sculpture. The paper mache that covers the skeleton can be viewed as the ‘flesh’ of the sculpture.
Another optional material is vaseline. This is utilized if you decide to create a paper mache piece by covering your paper over a mold of some sort by rubbing vaseline over the mold first to prevent the paper from sticking to the mold.

How to Seal Paper Mache
You generally do not have to seal paper mache items. YAY! However, sealing can be beneficial if you want the paper mache surface to be very smooth. Prior to sealing, you can use sandpaper to smooth out rough areas. If any gaps or wrinkling remains after sanding, a sealant can fill in the uneven parts. TIP : Sealers should be applied after your paper mache item has dried completely. Overnight is best for smaller pieces. Thicker pieces can take several days.
Gesso is highly recommended for use as the sealant since it dries very hard and provides an excellent finish that is ideal for applying acrylic paints. The best way to apply gesso is with a sponge or brush in multiple thin layers. Gesso is available in clear, white, and black. It dries in just a few minutes. People have had success with Mod Podge as a sealer as well.
How to Paint Paper Mache
Make certain that the surface is dust free and completely dry before you paint. Also be sure that the paper mache layers are not loose or uneven before painting. If there are loose pieces, just put a dab of white glue to hold it down. Painting with acrylic paint and a paintbrush is the preferred method of painting on paper mache. Acrylic paint is ideal because it is waterproof and has many color options. NOTE : The paint needs to be thoroughly dry between applications.
Acrylic markers sometimes are used instead of acrylic paint, and are a viable option. Watercolors are not ideal because they aren’t waterproof and tend to dry somewhat soft and dull. Additionally, watercolors and other paints can actually damage the unsealed paper itself. If you wish to apply your own personal touches to your project after painting, colored pencils or waterproof marker pens are a splendid choice. There are of course many other ways to embellish your work of art with your own, unique ideas!
Sealing After Painting
Your new paper mache creation can be sealed. This is an option that will protect the paint from sunlight and help to maintain vibrancy. The two practical materials for this final stage are gloss varnish or Gloss Mod Podge. Applied with a brush or sprayed, both will dry transparent and leave a hard shiny finish. Acrylic sealing spray is an alternative option and is considerably easier to apply evenly. PLEASE NOTE : The items you create are not food safe!!! They are for decorative use only!!!
How to Make a Paper Mache Bowl
Now that you know everything about creating with paper mache, let’s make a bowl! This is a fun and messy project, so protect your surface well. Kids absolutely love to do this. I find it very satisfying and almost meditative to make these small bowls. I used a small, round balloon for this project.

Small Balloon blown up and tied shut Permanent Marker Paper torn into 1/2″ wide strips about 3-6″ long White School Glue 4 oz. mixed 2 parts glue to 1 part water Salt (maybe 1/2 teaspoon) Foam Plate Whisk Gesso Acrylic Paint in color of choice (I used aqua) Blue Jay Print Here from The Graphics Fairy
Step-by-Step Directions
Step 1 – Prepare the Balloon: Blow up the balloon. Lightly draw a line around the balloon with a permanent marker. This will give you a guide to the edge area. However, the uneven edges of a Paper Mache bowl are what gives it the carefree look you want.
A Word About Balloons : I prefer to work with a colorful balloon. You can see any thin or gap areas more easily. I learned a lot about balloons while making this tutorial. I first bought a bag of small balloons (2-3″ round) at the grocery store. They were very small and so thin that some of them broke while being blown. I did like the small size bowl I made with them (see below). Then I went to my neighborhood dollar store that only had 6″ balloons. They were sturdy when blown, but larger than I had hoped. I would say that a 4″ balloon would be perfect for what I wanted. Just be aware that inexpensive balloons might frustrate you!

Step 2 – Tear the Newspaper: Tear the newsprint paper into strips about 1/2″ wide strips about 3-6″ long.The edges of the ripped paper will have fibers that grasp and grab hold of other pieces easily. (see the strips in the above photo) HINT : Do not cut the strips (tear them) as the crisp edges will be harder to work with . Trust me on this !! NOTE : The bigger the balloon, the longer the strips can be. I used 3″ strips for my 6″ balloon. The edges of wider strips will pucker when laid on the balloon.
Step 3 – Prepare the Paste: Thoroughly mix 2 parts white glue to 1 part water in a foam plate Sprinkle in a little salt; maybe 1/4 teaspoon. I use a wire whisk for this. The mix should be thin but not runny!!! (see photo below)

Step 4 – Dip and Place Newspaper: Place your balloon on top of a glass or jar with the tie inside. This will help to stabilize it while you work and dry the bowl. (see photo below) TIP : I added water to my jars to make them less apt to fall over while working!! WINK

Lay it over the balloon and smooth it down with your fingers. (see photo below)

Lay the strips randomly in all directions (see photo below). Repeat this process until you have three or 4 layers over the entire balloon.

You can hold the balloon up to a light source to see any thin areas. Leave it to dry overnight. The more layers of paper, the longer it will take to dry. If the bowl feels cold to the touch, it is still wet. Allow it to dry completely before removing balloon and decorating !
Step 5 – Remove the Balloon : There are a few ways to remove the bowl from the balloon. I will share my favorite. PLEASE NOTE : If the paper is not completely dry, it will be a struggle to remove the balloon . I found this out the hard way!!! Methis 1 worked like a charm on my second bowl. Method 1– Begin at the edges of the bowl where it touches the balloon. There will probably be a few gaps where the paper has started to pull away from the balloon. Start on one of these. Gently press the balloon in, away from the bowl. The paper should pop off fairly easily. Slowly and carefully work your way around the bowl, pressing and releasing the paper. If it is really stuck, allow the bowl to dry more. Method 2– Pop the balloon. Then gently pull the balloon out of the bowl. (ph0to below shows balloon sticking to the bowl) TIP : If it sticks to the bowl … STOP, it is still too wet. Allow to dry longer. Then gently remove the balloon.

Finished Bowl and Bowl Edges
Here is a look at the yummy, uneven edges of a paper mache bowl. The top photo is my test bowl. I did not have enough layers of paper at the edge. The front edge is torn a bit and you can see how translucent it is. But it still works, I think!

In this image, you can see the wavy and wispy edges of my finished bowl. Most of the edges have three or four layers of paper in my second try. You can also see the beautiful outside of the bowl, which is unsealed. Using plain newsprint dries to this rustic, almost rough plaster like look and feel. Printed newspaper with have dark areas where the ink was.

Step 6 – Decorate : There are several options for decorating your bowl. We will be painting ours and doing a transfer to the inside. But you can stain it, glitter it, gild it, etc.
- Sand the bowl if necessary according to the directions in the “How to Seal Paper Mache” section above.

- Paint the inside of the bowl with your color of choice. I used Golden’s Acrylic in Cobalt Teal. Allow to dry at least 1 hour. HINT : You want the paint to form a strong bond to the Paper Mache bowl for the transfer to work well. So don’t rush it!
- Transfer the Bird Image . Photocopy or Laser Image to transfer – I used this Blue Jay . I am using my Acrylic Paint Transfer Technique to transfer the little bird onto my bowl bottom. Again, I used Golden’s Acrylic in Cobalt Teal spread liberally in th area where the transfer will be. You can find the instructions for this technique HERE ! NOTE : It is a little trickier to transfer an image to a soft and bumpy surface.
- Take your time; don’t rush.
- Fussy cut the image leaving just a tiny white edge around it.
- Apply plenty of paint; more than you may think is necessary. If it dries before you get the image burnished down, those areas will not transfer.
- Burnish, then burnish more. I used my fingers first and them my bone folder. I worked on this for several minutes to make sure every single part of the image was embedded in the paint.
- Allow the image to dry at least 3-4 hours before wetting and removing the backing paper. It would be better overnight!
- Use very little water to remove backing paper. The water necessary to remove the backing paper can soften sealed and unsealed Paper Mache.
- Rub the paper backing very gently and stop if any of the image begins to come off!!

- Seal the transfer inside of the bowl with a glossy medium or spray. This will help make the image pop and look clear. I used Mod Podge Gloss Spray! Use the steps in the “Sealing After Painting” section above.
- Enjoy your bowl!!

That was a bunch of messy, creative FUN!!! I hope that you enjoyed The Paper Mache Beginner’s Guide and learning How to Make Your Own Paper Mache Bowl with me!! When I am not exploring with new and old Techniques for Mixed Media in my Graphics Fairy sandbox, I also create Photoshop Elements tutorials and craft project tutorial videos over on The Graphics Fairy Premium Membership site . You can find even more of my books, junk journals, mixed media art, classes, and whimsical shenanigans on Rebecca E Parsons Dot Com .
May joy be with you all,

You May Also Like These

November 21, 2021 at 8:34 am
Rebecca, you make this sound so easy! I once made a hot air balloon with my daughter for her bedroom (long, long ago) Tonight my grandboys are spending the night and I am thinking we will use your directions and make a Christmas bowl for their mother! Thank you so much. I also thought with them making the bowl maybe a photo transfer of the two of them might be fun. Have you tried that? Anything I need to be cautious of doing or not doing. I would hate to ruin their bowl. They loved making paper together so I am thinking they will love this. Again thank you for the very clear instructions.
Karen Watson says
November 21, 2021 at 4:12 pm
Hi Sandy, I’m so glad you liked Rebecca’s project! What a great idea to make a Christmas bowl with your grandkids! If you are going to do the photo transfer, I would definitely create a little scrap paper mache piece that you can experiment on before doing it on the actual bowl. Since we all have different types printers, ink, and use different brands of paint, it’s best to try it for yourself on a practice piece so that you know exactly how it will turn out, with your supplies I hope that helps!
Giuseppa says
November 8, 2021 at 8:30 am
Grazie. La spiegazione è chiarissima.
November 8, 2021 at 6:07 pm
November 4, 2021 at 6:25 pm
Thanks so much Rebecca, I remember doing this at school. What a fun project!❤️
November 5, 2021 at 10:18 am
I’m so glad you enjoyed Rebecca’s post Sue! 😊

DIY Project at Home: How to Craft Your Own Paper Mache Sculptures
Stock Photos from Arina P Habich/Shutterstock This post may contain affiliate links. If you make a purchase, My Modern Met may earn an affiliate commission. Please read our disclosure for more info.
If you've ever dreamt of dabbling in sculpture but lack the studio space, you're in luck. While you may think you need access to a kiln to start sculpting, studio-free methods like oven bake clay and origami make mastering the art form quick and convenient. However, if you're less interested in all-inclusive DIY kits and more keen to try your hand at a homemade approach, paper mache may be the craft for you.
This centuries-old sculpting method transforms ordinary paper and simple paste into three-dimensional creations. On top of its decorative versatility and distinctive aesthetic, paper mache is praised for its preparation, which you can complete in just a few simple steps.
What is Paper Mache?

Paper mache—derived from papier-mâché , or “chewed paper” in French—is a sculpting medium made up of paper pieces that have been bound by an adhesive paste. Today, two popular methods are predominantly used to craft a paper mache creation.
For the first technique, the sculptor glues together long, narrow strips of paper that are usually laid and layered atop some sort of frame. For the second technique, the sculptor creates a pulp by boiling or soaking bits of paper joined by water. The mixture can then be molded like clay.
Though these methods differ in both preparation and procedure, both share a composition comprising paper and paste.
How to Make Your Own Paper Mache Paste

Stock Photos from ffolas/Shutterstock
As with any homemade concoction, there are several different ways to create a paper mache paste. The most traditional recipe, however, requires just two ingredients: flour and water .
To make the mixture, simply combine one part (e.g. 1 cup) flour with two parts (e.g. 2 cups) water. Stir the ingredients until the consistency is smooth and similar to that of standard glue (try to tackle any lumps as best as you can). Once your paste has reached this point, you're done—though you may consider adding 1/2 tablespoon of salt for every cup of flour used. This helps prevent mold as your sculpture dries.
Once your paste is complete, you need to gather your paper (newspaper and tissue paper are popular choices, though you can use sheets of any kind) and tear it into strips. Then, depending on the technique, you can combine the paper pieces with your paste.
Popular Sculpting Techniques

Stock Photos from varuna/Shutterstock
With such a simple composition, paper mache is notably versatile; the possibilities are endless! However, there are a few popular methods that are perfect for both experienced sculptors and those looking to hone the craft.
Balloon Mold

Stock Photos from Ina Fischer/Shutterstock
One tried and true method of paper mache sculpting is to employ a standard balloon as a mold. This is a perfect technique to achieve sculptures with a rounded shape, including eggs, animal torsos, and even bowls. To use this method:
- Inflate the balloon to the desired size.
- Dip a strip of paper into the paste, allowing it to soak up the liquid until it is completely saturated.
- Place the paper onto the balloon and smooth out any bumps or lumps using either your hand or a paintbrush .
- Repeat until the balloon is covered in two to three layers of paper.
- Let the sculpture dry for a day or two.
- Use a pin to pop the balloon.
- Paint or decorate the sculpture.
Cardboard or Paper Frame

Stock Photos from Kolpakova Daria/Shutterstock
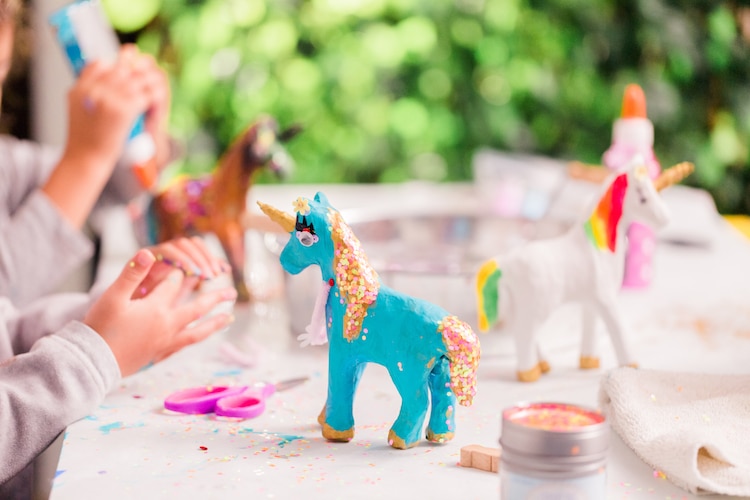
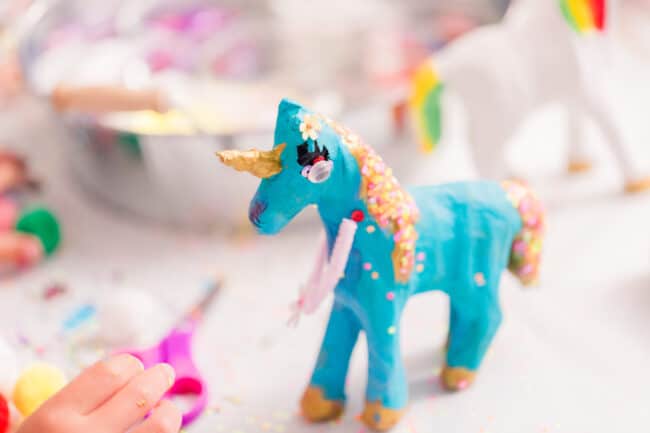
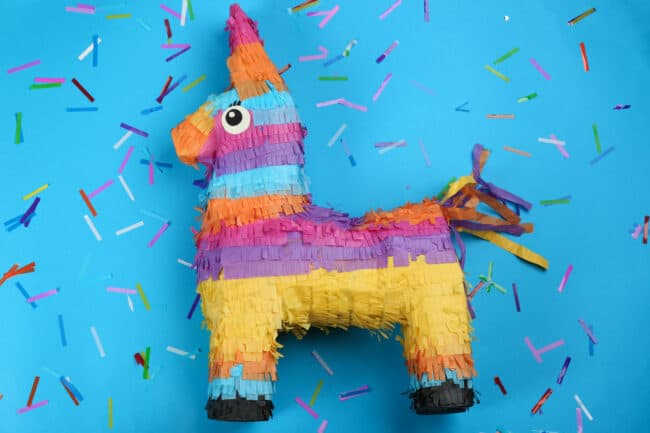
Other materials you can use to craft a makeshift mold are sturdy paper or cardboard. By cutting up the medium and joining the pieces with masking tape , you can create any shape you can imagine, with animals being among the most popular choices—especially donkeys, llamas, and others used for piñatas , which are handcrafted containers traditionally made from paper mache, filled with candy, and broken as a form of celebration.
- Create your cardboard frame.
- Saturate a strip of paper with the paste.
- Place the paper onto the cardboard, making sure to smooth out any wrinkles.
- Repeat until the cardboard is covered in two to three layers of paper.

Stock Photos from Evseymarta/Shutterstock
A third popular method of paper mache-making is to create a pulp . Unlike the balloon and cardboard approaches, this technique does not incorporate strips of paper dipped in paste. Rather, it requires you to mix the paper with water (no flour needed). This forms a putty-like substance that can be used to craft a free-standing sculpture without a mold or frame.
- Tear your paper into small (around 1/2 inch is ideal) pieces.
- Place the pieces into a mixing bowl.
- Add two cups of boiling water to the paper, stirring in order to ensure that all the pieces are saturated.
- Let the mixture cool.
- Use a blender to smooth the mixture into a pulp.
- Strain the pulp using a colander, making sure all excess water is removed.
- Create your sculpture.
- Let it dry.
Finishing Touches

Stock Photos from Arina P Habich/Shutterstock
One of the benefits of the paper mache is that, no matter the method, the end result is a lightweight sculpture that can be easily decorated. To add some color to your creation, you can use myriad kinds of paints, including oils , acrylics , gouache , tempera , and even watercolors . You can also add embellishments like feathers , sequins , rhinestones , and buttons . No matter what, you're bound to end up with a one-of-a-kind creation!
Related Articles:
Learn the Ancient History of Mosaics and How to Make Your Own Colorful Creation
Why Artists Use Gold Leaf and How You Can Make Your Own Ethereal Paintings
3 Easy Steps to Brighten Your Home With a DIY Terrarium
Get Our Weekly Newsletter
Learn from top artists.

Related Articles

Sponsored Content
More on my modern met.

My Modern Met
Celebrating creativity and promoting a positive culture by spotlighting the best sides of humanity—from the lighthearted and fun to the thought-provoking and enlightening.
- Photography
- Architecture
- Environment
Do you love organizing? This newsletter is for you! →
How to Make Paper Mache

By Karo @ CraftsyHacks.com
on Jan 28, 2022, Updated Jun 03, 2024
This post may contain affiliate links: full affiliate disclosure .

Make paper mache with kids with all-natural ingredients. You can then use it to create all sorts of cute projects for kids and teens.

Doesn’t paper mache just take you right back to your childhood? I remember long summer afternoons when my mother and I would get our hands all messy and squishy making our very own paper mache dough from scratch!

Just making the dough—we called the lumpy paper that and the name stuck—was super fun, but why stop there? You can make a ton of craft items with it, like little trinket bowls, ornaments, and even paper mache alphabets.

Watch Full Tutorial: How to Make Paper Mache
Supplies and Tools You’ll Need for Paper Mache
Here’s a list of supplies and tools you need to make your paper mache dough:
- 1/2 toilet paper roll
- Cheesecloth
- 1/2 glass of water
- 1/2 glass of wheat flour

You should definitely consider laying out plenty—and I mean plenty —of paper towels or newspapers around you while you work on this DIY project . It’s going to be messy right from the get-go.
If you’ve laid out newspapers over your work surface, you can get right down to the fun and therapeutic part of this project: shredding paper!
Go ahead and start ripping your paper into smaller pieces before putting them in a bowl.

You can definitely use newspapers, as well. Just remember to tear the newspaper into really small pieces as the dough will end up thicker and harder if you don’t.

While you’re shredding the paper, put a kettle on. It’s not just to make yourself a cup of tea, although you definitely should. You’re going to pour boiling water over your shredded paper and let it sit for a couple of hours.

The hot water helps with breaking down the cellulose, and your paper will get all soft and squishy. Don’t skip this step, though. When you let the paper sit in the boiling water, your dough will end up more pliant.
Also, if you use newspaper, then you will have to let it sit in the water overnight. Newspaper is much thicker and needs more time to soften and for the cellulose to break down.

Next, when you’re sure your paper has been sitting in the water long enough, grab a hand blender and mush everything into pulp. You will either love the squelching sounds you’ll hear, or you won’t.
Me? I get a kick out of it!

Stop pulping the paper when it looks something like this.

It’s time to strain your pulp and drain all that water. Place a cheesecloth over a big bowl and carefully pour your paper pulp into the cloth.

Gather the ends and squeeze the excess water out of the pulp into the bowl below. If you think you’ve squeezed enough, just do it again, just to be extra sure!

When you take the pulp out of the cheesecloth, it should look something like this. Break the pulp into little pieces and put them into a bowl.

If I didn’t know better, I’d say it looks an awful lot like ricotta or cottage cheese.

Now, you’re going to prepare the binding paste to turn that pulp into your paper mache dough. Grab another bowl and add your white flour to it. You can just as easily use cornstarch which will be just as effective, if not more so.

Stir your water in—not all at once, but in parts so that the flour doesn’t turn lumpy. Your paste should be smooth and sticky but not runny. You will need to cook this paste, so to speak. Place the contents in a saucepan with the heat on low.

The mixture needs to be heated for around five minutes, or until the water evaporates and you have a thick and creamy paste. You have to keep stirring the paste constantly, or it will burn.
Alternatively, you can pop it into a microwave. Heat the paste for 15-20 seconds, take it out, stir vigorously, and then it goes in there again for another round. Repeat this a few times till the paste thickens.

Spoon the paste onto the pulp.

This part is my absolute favorite: rolling and kneading the dough. But first, roll up your sleeves; it’s going to get messy.

If your dough is wet, just sprinkle a little flour over, and keep rolling. If it’s too dry, just a few drops of water should help soften it. Kids, in particular, will love this part of the activity!

When you’re all done, your paper mache dough will look like this—good enough to eat and even better to start making your paper mache craft items.

What Can I Make from Paper Mache?
There’s absolutely no limit to what you can do with paper mache. Just making the dough can be a great activity, but when you do have the dough ready, you can make a ton of things.
If you have a chocolate or candy molk just press the dough into it and flatten it out. When it’s dry, you can pop it out, paint it, and use it as ornaments and baubles.

If you want to make lesson time more fun and creative for your little ones, then make a set of paper mache alphabets and use them to teach toddlers their ABCs.

You can also make trinket trays, bowls, and small dishes, and use it to store, well, trinkets! Just cover the outside of a plastic or glass bowls with clear wrap or cling film, spread a drop of oil around it, turn it around, and stick paper mache dough around it, just so.

Can You Use Hairdryer to Dry Paper Mache?
Yes you can use a hairdryer to dry your paper mache. However, you should turn the heat setting down to low, or your mache will scorch. Remember, paper mache is pretty flammable! Besides, using a hairdryer might not dry the paper mache evenly, either.
Smaller pieces will dry up faster, while bigger ones will definitely take longer. Just allow whatever you end up making to air dry for at least 2-3 days—longer if the item in question is thicker. Once dry, you can go ahead and paint it.
Here’s a tip: if you want your paper mache to last longer, add a teaspoon of salt to the dough just before you start kneading. You can store the dough in the fridge for up to a week, as well!

Other Crafts You Might Want to Make
- 41 Cardboard Crafts
- How to Make Paper Tissue Paper Flowers
- How to Make Paper Lanterns
- 27 Classroom Crafts
- How to Make Paper Squishies
- DIY Paper Flowers
- DIY Paper Rings
- 31 Summer Crafts for Kids
- 31 Paper Crafts for Kids
- 37 Tissue Paper Crafts

How to Make Paper Mache (Step-by-Step)
Materials .
- ▢ 1/2 toilet paper roll
- ▢ Cheesecloth
- ▢ 1/2 glass of water
- ▢ 1/2 glass of wheat flour
- ▢ Spoon
- ▢ Blender
- ▢ 2 x bowls
Instructions
- Gather all the materials listed out to begin.
- First, lay out plenty of paper towels over your work surface to control messes and spills.
- Now, tear paper or newspaper into tiny pieces and put them in a big bowl. You can also use a pair of scissors. Newspaper is thicker and so, tear it into much smaller pieces.
- Next, pour boiling water over the paper and let it sit for at least 2 hours(overnight if you used newspaper). The hot water will break down cellulose and turn your paper into pliable pulp.
- Drain the pulp into a cheesecloth and squeeze the excess water out. Squeeze until you’re sure you managed to get all the moisture out of the pulp.
- Remove the pulp from the cheesecloth and break it into tiny pieces and put everything in a bowl.
- To make the flour paste, add flour(or cornstarch) to another bowl and mix in some water. Then, place this paste over low heat and stir continuously as it ‘cooks’ for 4-5 minutes. When the excess water evaporates, your paste should be smooth and sticky.
- Alternatively, pop the paste into a microwave for 15-20 seconds, take it out, stir it, and pop it back in for another round. Repeat this 4-5 times and you’ll have your paste.
- Pour the paste onto the pulp and knead them into a pliant dough. You can store this dough for up to a week in the refrigerator.
- Go ahead and make a ton of paper mache craft items with your dough. Once you allow everything to air dry for a couple of days, you’re all done!
Recipe Video
You May Also Like:

The Cutest DIY Hand Flowers

The Cutest Rainbow Popsicle Stick Craft

Cutest DIY Chick Craft

Yarn Bird Craft
Leave a comment cancel reply.
Your email address will not be published. Required fields are marked *

- Skip to primary navigation
- Skip to main content
- Skip to primary sidebar
- SEWING TUTORIALS
- FREE SEWING PATTERNS
- CROCHET TUTORIALS
- FREE CROCHET PATTERNS
- OTHER CRAFTS
How to Make Paper Mache, Made Easy for Beginners
Modified: Feb 25, 2024 by Treasurie
Learning the basics of how to make paper mache will ensure you can accomplish multiple projects with ease and confidence. This tutorial will give you the basics of paper mache using paper strips.

How to Make Paper Mache, Step by Step Instructions
The general steps that you need to take when making paper mache crafts using paper strips are as follows:
Table of Contents
The things you would need for this method on how to make paper mache are as follows:
- Container or Large Bowl: This item should be large and deep enough to hold the other materials and more. It will ensure you won’t make too much mess.
- Adhesive: Whatever type of adhesive you choose, ensure that you prepare the amount that suits the size of your project. 1 cup flour.
- Cold Water: For how to make paper mache methods, you will use water to dilute your adhesive, giving it a smoother consistency and making it more convenient to use.
- Molds: This item will help you achieve the shape and design you’re going for, so first-timers should choose the most basic ones. The mold can be a balloon, clay or plastic.
- Paintbrush (Optional): Choose a soft-bristled, fine paintbrush. You can have two, one for smoothening out the adhesive and prevent air bubbles, and another for painting your project.
- Paper: Aptly named, paper will be the main material for this project.
Best Paper for Paper Mache
Some of the best types of craft paper that you can use are:
- Strips of Newspaper: Used newspaper is the most common and affordable paper that you can utilize. It also holds well, so it’s the perfect base.
- Kraft Paper or Brown Paper Bag: Similar to the newsprint, this is an affordable option, especially for practicing how to make paper mache. However, it’s a little thicker.
- Construction Paper: You can choose from light to medium thickness, depending on your project. The problem is that it won’t work for most projects because it has a rough texture.
- Printer Paper: Like the construction paper, you can choose from several thickness levels. This type of paper also has a smooth surface, unlike the newsprint.
- Crepe Paper: Yes, this is very thin paper, so it’s best used for creating the finer details of your paper mache project. The best thing about it is it comes in various colors, so you can skip the painting step. Plus, it’s rough or wrinkled, adding texture to your finished design.
- Tissue Paper or Paper Towel: An alternative to crepe paper, this is more readily available at your home.
Types of Glue for Paper Mache
The best adhesive is PVA glue because it’s safe, durable, free of mold and rot, dries quickly, clearly, and evenly, and has excellent strength and smoother texture. Nonetheless, you can opt for the following:
- Regular Wood Glue: Being water-soluble, non-toxic, and strong, this is a good alternative. However, once it dries, it’s no longer flexible. You can also opt for type 1 yellow or carpenter glue.
- Mod Podge: This easy-to-clean, toxic-free, and water-soluble option is perfect for the finishing stage of the how to make paper mache process. Just note that it dries quickly.
- School Glue or Elmer Glue: This adhesive is the most affordable and easily accessible commercially available glue that is versatile and strong. The issue you’ll encounter is that it softens when exposed to water. You also won’t be able to sand it.
- Wallpaper Paste: The last adhesive you should opt for is wallpaper paste because it has toxic ingredients. You also need to experiment with the ratio when diluting it. But if you have this at home already or use it in your other craftworks, then go for it, making the process more cost-effective.
- Homemade Flour Mixture: Making your own simple recipe for adhesive using 1 cup of plain flour is the most affordable, best for kids and it also works great!
Step 1 - Prepare Your Working Area
Having your own crafting table would be great, but you can choose to work on any table in your home or a workbench in your garage. Either way, it’s best to protect it from any drip and mess that usually happens while accomplishing your paper mache project.
First, ensure that the surface is clear of any other objects and clean. Then, place a cover. You can use an old table cloth or fabric, a plastic cover, newspaper, or any scrap pieces of paper.
Step 2 - Make Paper Strips
Create plenty of long paper strips using your hands or scissors. The ideal thickness for a newspaper strip is 2.5 centimeters or one inch, but feel free to choose the strips’ size. They don’t need to be perfect; in fact, you can even create strips of different widths to add more volume to your mache project.
Step 3 - Make a Paper Mache Paste
Choose an easy paper mache recipe. Simple paper mache is made just with flour and water.
For this paper mache recipe , place the adhesive and water in your container, following these recommended adhesive to water ratios:
- PVA, Modge Podge, School Glue: 2:1 or 1:1 (Using the 1:1 ratio will give a stronger glue but you may need to experiment to get the right consistency.)
- Homemade: 1:1 (1 cup of flour to 1 cup water, or 1 part flour to 1 part water)
- Wallpaper: 1:1 (1 part wallpaper glue to 1 part water)
Next, whisk the mache paste recipe using your paintbrush or a spoon until you reach a smooth consistency.
Adjust the quantities if needed. You can add a little water if it’s too thick or adhesive if it’s too thin. You don't want any bumps in your mixture, so stir well.
Adding 1 or 2 tablespoons of salt to the paper mache glue will make your mixture last longer in high humidity if you plan on storing excess paste for later.
Step 4 - Dip the Strips in the Solution
Place a few strips of paper in the bowl or container with your glue paste. Ensure you don’t put a lot to cover both sides of the paper strips. That said, you must also ensure that you don't saturate them too much.
If you don't want to use strips, a paper mache pulp can be made by blending the paper and glue strips.
Step 5 - Layer Your Soaked Strips
Take one of the soaked paper strips, and carefully slide from top to bottom two of your fingers to help remove any excess adhesive. Hold it for a while and let the adhesive drip in the container. Slowly lay it on the surface of your mold, and then smooth it out. You can do so with your paintbrush or fingers.
Repeat the process, but make sure you achieve the shape and design you want while laying the rest of the strips. Make sure you also achieve your desired texture, volume, and details.
If you run out of strips, repeat steps five to six of the paper strip procedure.

Step 6 - Let It Dry
Leave your project to dry for at least 24 hours. Once dry, you can start painting it or add any details or embellishments that you want.
Once you’re done, you can slowly start removing the dried design from its base model.
Step 7 - The Finishing Touches
Paint the paper mache project using acrylic paints. Apply a clear coat, such as varnish, all over the project to seal it properly, And you’re done!
How to Make Paper Mache - Ideas & Projects
If you’re unsure what kind of project to accomplish, below are some great paper mache ideas that you can start with, from the most basic to the most complicated.
Paper Mache Balloon
The process of making a paper mache balloon is simple. All you have to do is inflate the balloon, and follow the instructions above. The demolding part involves popping the balloon.

Paper Mache Globe
The how to make paper mache globe procedure is almost the same as the balloon’s, except for the finishing part. Paint it blue, create outlines to paint with green, and create smaller details or outlines with brown.

Paper Mache Pumpkin
Perfect for Halloween, a paper mache pumpkin uses a balloon inside. All you need to add to the steps is to wrap twine around the inflated balloon to create the pumpkin’s lines, leaving some excess for the stalk.

Paper Mache Pinata
In making a pinata paper mache , your mold will depend on the design that you want to achieve. You can use a balloon for a round animal, or a box for a traditional pinata. Decorate it with tissue paper. Don’t forget the candies, coins, and more!

Paper Mache Volcano
A more complicated project that you can jump into after a few practices is how to make paper mache volcano . For this, you need an empty bottle instead of a balloon. You will also need a cardboard box to create a base for your volcano.

Paper Mache Bowl
You can make a paper mache bowl by using either paper strips or paper pulp. Just use any sized bowl as your mold and follow the standard steps we discussed.

Paper Mache Mask
There are three different ways how to make paper mache mask s: using a mesh wire, a balloon, and paper pulp. The most challenging part is adding the details, such as the eyes, and ensuring the final product has the shape of a face.

How to Make Paper Mache - In Conclusion
Making paper mache involves simple steps. It's the design you choose that will make it complicated. Thus, it’s best to start from the simple ones and then progress as you practice. Also, make sure you choose the adhesive and paper you’re comfortable working with. Have fun!
More Paper Crafts

Reader Interactions
Leave a reply.
Your email address will not be published. Required fields are marked *
Get Access to the FREE DIY & Craft Hub & discover something new to explore!

FREE RECIPE EBOOK! Get your copy! >
A Beginner’s Guide to Papier Mache
Papier Mache is a really fun craft to learn and do. Here you will find out everything you need to know about how to create papier mache objects!
Papier Mache always reminds me of my school days when art lessons would involve quite a bit of papier mache!
I very vividly remember once creating a papier mache ball – we pasted the special mixture over a regular balloon and then once it was dry we popped the balloon – and lo and behold we had a papier mache ball!
It was a great craft to do at school – it was somewhat messy (kids love that!), you didn’t feel like you were actually doing ‘school work’, and you could create some amazing things!
Papier Mache is a really really fun craft to try and do. You can really use your hands and imagination to create some amazing things with paper and a gluey mixture! You don’t need to be a kid to appreciate the fun creativity of papier mache.
What is Papier Mache?
Papier mache, (pronounced “pap-ee-ay mash-ay,”) is a crafting technique involving paper and a paste-like mixture to create a wide variety of objects.
The name itself comes from the French words “papier” meaning paper and “mache” meaning mashed or mashed-up. That is exactly what papier mache is all about – mashing up paper to form unique creations!
Where Did Papier Mache Originate?
The origins of papier mache can actually be traced all the way back to ancient Egypt and Persia.
These ancient civilizations this method to create masks and coffins. However, it was during the Renaissance period in Europe that papier mache started to flourish and gain popularity.
In the 17th and 18th centuries, papier mache became a fashionable and affordable alternative to expensive woodwork and decorative items.
Papier mache was extensively used to create ornate furniture, intricate boxes, and even musical instruments.
The technique then spread to other parts of the world, with each culture adding its own unique touch and designs to the craft.
How Do You Make Papier Mache?
Making your own papier mache is incredibly easy and fun! Here is a simple step-by-step guide to start your own:
1. Gather your materials: You will need torn or shredded newspaper, a paste mixture, a bowl, and a mold (if desired).
2. Prepare the paste: There are various paste recipes that you can use, but a basic one involves mixing equal parts of flour and water until the mixture is a smooth consistency. You can also add some salt to the mixture to prevent the growth of mold.
4. Let it dry: Allow your creation to dry completely. This may take a few hours or even a couple of days, depending on the size and thickness of your project.
5. Decorate and finish: Once your papier mache is fully dry, you can paint, varnish, or decorate it as you wish. Get creative and let your imagination run wild!
Papier Mache is a really versatile crafting technique that can create so many different objects and designs.
You can create practical items, decorative pieces, and also fun pieces such as party supplies with Papier Mache.
Here are a few ideas of Papier Mache crafts that you may want to create:
Pinatas You can create your own pinatas for birthday parties and other fun gatherings. Making a pinata is also really fun and rewarding. You can choose your own shapes and colors for your creations, and fill it with whatever you want to!
Decorative Bowls You can make some amazing decorative or functional bowls with Papier Mache. To make a bowl you will need a mold, either a balloon or a bowl.
To this mold you add strips of newspaper that are dipped in the special paste. You will layer the strips over the mold and then let it dry. Once the bowl is dry you need to gently remove the mold and then paint the bowl in the colors you choose.
To make a mask you will shape a mask base over a face mold or your own face. Once this base is dry you can paint it and decorate it as you want.
Sculptures Papier Mache can also be used to create some amazing sculptures. This requires a bit more creativity and more work and time, but it is well worth it.
You can create abstract shape sculptures, animals, and all kinds of things! To make a papier mache sculpture you will need to start with a wire armature in the shape that you desire.
You then cove the armature with the papier mache mixture to build up the form. Once the form is dry you can color, paint and embellish it.
Papier Mache is also a really great craft project to do because you can just experiment and try all kinds of different shapes and objects!
Papier Mache is a really fun craft to learn and do. Here you will find out everything you need to know about how to create papier mache!
Make Calm Lovely is about creating calm and lovely in your life: through organization, productivity and exploring your creative side. I have great DIY & craft tips & ideas (including great IKEA hacks!) Plus lots of organization and productivity tips and advice, so you can create more time for the lovely in your life!
Leave a Reply Cancel reply
Your email address will not be published. Required fields are marked *
The Ultimate Guide to Paper Mache for Beginners
Are you interested in learning how to make paper mache? Paper mache is a craft that you may think of in a time of creative inspiration.
The concept of paper mache has been around for longer than paper creation. Despite its age, it has stayed strong in the crafting world throughout history. Paper mache has since been established as effective but easy to utilize.
This craft may seem overwhelming to those who have not had any experience with paper mache before.
Thankfully, everything down to the mixture you will use is things found in everyday life. Let’s get to everything that you need to know about paper mache.
What is Paper Mache?
The history of paper mache, paper mache in modern times, what supplies do i need for paper mache, how to create paper mache art, tips for paper mache art, paper mache video tutorials.
Paper mache, or papier mâché (“chewed paper” in French), is a method of art that involves paper and a paste that the artist creates.

This paste is made of easy-to-find ingredients that you may already have in your house, saving you a trip to the craft store!
The paper you have will be torn into strips and then coated in the mixture you make before being put onto a surface of your choice. Surfaces can consist of things such as balloons, bowls, or vases.
The paper you use that is saturated in the paste will harden as it dries, becoming a light but durable material.
Once it has dried, the paper mache will be strong enough to hold what it needs to hold but will break if put under enough pressure.
Paper mache as we know it today is thought to have originated from China, where paper itself was first invented.

These first instances of paper mache were likely for helmets. While paper mache is not strong enough to save you from any of today’s weapons, it does show how highly they valued this material.
While China has the first known instance of paper mache as we know it today, if you look further back in history, you will see a close relative that can be found dating back to Ancient Egypt.
Ancient Egyptians would coat pieces of papyrus or linen into the plaster to create objects for funerals. Coffins and Egyptian death masks would be crafted from this paper mache version.
Perfect Hobby For You:
- Polymer Clay
- Needle Felting
- Wood Burning
- Collage Art
Paper mache is a popular crafting method even in the modern era, but it has also been known to be used for practical uses.
It was not that far back in history that paper mache was being used for fuel tanks and canoes.
While this practice has not necessarily continued into modern day as we know it, it was less than 100 years ago that the craft was being utilized for these items.
Today, it is much more common to see paper mache used to make objects such as pinatas and parade floats. You also may see artists using paper mache to create figures, jewelry, and more.
Paper mache can be incorporated into whatever craft you are interested in.
If you are into fairy gardens , you can make a paper mache piece for an indoor terrarium.
Artists globally produce their own impressive works of art with paper mache, with a portion of these artists making their profession solely in paper mache.
If you are a crafter who would prefer a more hands-on method with your craft, consider paper mache a great candidate.

Flour or Glue
Base of choice.
When you are gathering materials for your paper mache project, paper will be the absolute necessity.
Feel free to upcycle any old newspaper or magazines and use their pages as the strips of paper for your paper mache project.
This is a great way to be more environmentally friendly while also saving yourself money.
If you did not have anything spare lying around, Amazon offers over five pounds of blank newspaper for your crafting needs.
Water is one of the next priority materials for paper mache. Water will be your friend, as it is a significant ingredient in your paste.
Without any moisture, there wouldn’t be a paste after all. It does not have to be any particular kind of water; simple tap water would be sufficient.
While there is a way to also do paper mache using glue as the base, flour is a more available product for this craft.
Just as water was a significant ingredient for the paste, flour is the next ingredient.
The dry powder of the flour will mix with the water to slowly create a paste with a consistency based on your personal preference.
If you are using glue, the glue will mix with the water just as the flour does.
Your paste will need something to be mixed in. You will need a container that will be large enough for you to easily coat strips of paper in, as well as holding the paste mixture itself.
Salt is recommended by some paper mache artists to be added to your paste for its antifungal elements.
However, it isn’t a miracle worker, and you will still want to take extra precautions to prevent mold.
While the whisk is not a necessity in your paper mache experience, it will certainly ease the way.
The whisk will help to mix your paste together, breaking away any dry clumps to give you a smooth mix.
The bases you can use are endless, but one great beginner’s item is balloons.
You can apply your moist strips to the balloon to form your project’s shape. When it is dried, you can pop the balloon to remove it easily.
Another option is to use these masks to create paper mache masks that can be used as decorative items.

- Gather your materials and prepare your crafting area. Make sure all your materials are within reach. You also want to be sure to protect your environment, so prepare your crafting area ahead of time.
- Combine flour/glue and water into the bowl and mix until desired consistency. When you begin to make your paper mache mixture, you will combine your two ingredients in a bowl until it reaches the desired consistency. If the mixture is thick, you add water. If the mixture is thin, you add flour or glue.
- Add some salt if you want. While not a necessary step in this procedure, if you add salt to your mixture, you will help keep your work free of any potential mold while it is drying.
- Whisk until smooth. When you combine these elements together, you will want to mix it until there are no dry lumps. This is a very similar situation to stirring some batter.
- Cover your paper in the mixture of flour and water. When your mix is to your liking, this is when you will begin creating with it. You will grab strips of paper one at a time and saturate them with your mixture.
- Ensure no excess mixture is on the paper by using your fingers to wipe the strip. While you want your strip of paper to be saturated enough to stick to your project, you do not want it to be so soaked that it dries slower. Because of this, you can take off any excess by brushing down with the paper strip in between two of your fingers.
- Place the paper over whatever base you have chosen. If you have selected a balloon, this is where you will keep your balloon steady and begin applying the strips. However, if you’re using a bowl or something else, you will want to apply a nonstick element to your bowl before adding the paper mache.
- Cover the surface as much as you wish. Whether you are creating a bowl and thus only utilizing half of the balloon or if you’re making something different that requires the whole balloon, it is entirely up to you.
- Let dry before beginning a second layer, or you may risk mold. If you are going to apply more than one layer of paper mache, waiting for the previous layer to dry before adding another is the best idea. Even with the salt element, you do not want to risk mold from over-saturation.
- Apply as many layers as you wish. While you have to wait for each layer to dry, apply as many layers as you want if you have the patience!
- Allow it to dry. Finally, when you have added all the layers your heart desired, it is time for you to wait for it to dry completely.
- Remove your base. If you were using a balloon, this is where you can simply pop the balloon. If you were using the bowl, this is where you will be thankful that you used a nonstick agent, as the bowl will be much easier to remove than if you hadn’t.
- Decorate as you please! If you plan on coloring your paper mache masterpiece, it is best to use acrylic paints ! There are also many more decorating ideas to truly customize your project.
Place the Paper Mache Strips In As Many Ways As Possible
If you place every paper mache strip in the same direction, you will have a fragile piece when your project dries. Instead, try to apply your strips of paper to create a strong base in as many directions as possible.
Do Not Paint Until Project is Dry
In the same light as not applying another layer of paper mache until the first layer is dry.
You will not want to paint before your project is completely dried. This increases the chances of mold, which can entirely ruin your work.
You Can Add Aromatherapy Scents
If you do not like the smell of your flour and water mixture, you can also feel free to add aromatherapy scents to your mix.
Be Prepared to Be Patient
When you are doing paper mache, you need to be patient. With how much dry time is involved and how crucial dry time is, you will be spending a lot of time waiting to move onto the next step in your project.
You may want to consider a different craft if you are all for instant gratification.
Paper mache is a craft that has grown with humanity, from its ancestry in Egypt to its origination in China.
The materials you need to craft with paper mache are accessible and may already be things you have in your home.
There are so many potential projects for you to test your new crafting skill and a world full of information waiting to be learned. Whatever your reason for learning paper mache may be, the path ahead will be adventurous.
Leave a Comment Cancel reply
Save my name, email, and website in this browser for the next time I comment.
Privacy Policy
- PRO Courses Guides New Tech Help Pro Expert Videos About wikiHow Pro Upgrade Sign In
- EDIT Edit this Article
- EXPLORE Tech Help Pro About Us Random Article Quizzes Request a New Article Community Dashboard This Or That Game Popular Categories Arts and Entertainment Artwork Books Movies Computers and Electronics Computers Phone Skills Technology Hacks Health Men's Health Mental Health Women's Health Relationships Dating Love Relationship Issues Hobbies and Crafts Crafts Drawing Games Education & Communication Communication Skills Personal Development Studying Personal Care and Style Fashion Hair Care Personal Hygiene Youth Personal Care School Stuff Dating All Categories Arts and Entertainment Finance and Business Home and Garden Relationship Quizzes Cars & Other Vehicles Food and Entertaining Personal Care and Style Sports and Fitness Computers and Electronics Health Pets and Animals Travel Education & Communication Hobbies and Crafts Philosophy and Religion Work World Family Life Holidays and Traditions Relationships Youth
- Browse Articles
- Learn Something New
- Quizzes Hot
- This Or That Game
- Train Your Brain
- Explore More
- Support wikiHow
- About wikiHow
- Log in / Sign up
- Hobbies and Crafts
- Paper Craft
- Papier Mache
How to Make a Papier Mâché Mask
Last Updated: June 29, 2024 Fact Checked
This article was co-authored by Amy Guerrero . Amy Guerrero is an Arts and Crafts Specialist and the Owner of Sunshine Craft Co., a crafting studio based in Phoenix, Arizona. Amy specializes in macrame, DIY crafting, and teaching fiber arts. She offers monthly in-person and online workshops along with having developed a range of DIY craft kits for at-home projects. Amy holds a BS in Industrial Design from Philadelphia University. She worked as a graphic designer before starting her own business. Sunshine Craft Co. is a creative hub that offers a wide range of workshops, tools, and resources for any craft project to inspire creativity and community engagement. There are 9 references cited in this article, which can be found at the bottom of the page. This article has been fact-checked, ensuring the accuracy of any cited facts and confirming the authority of its sources. This article has been viewed 161,940 times.
If you are stuck for costume ideas or can’t find the right mask, why not get creative and make your own? Papier mâché masks are made out of newspaper and glue, and if you have a friend to help you they are surprisingly easy to make. Prepare the glue and newspaper strips first and then begin molding the mask on your friend’s face. Apply additional layers of newspaper and glue to create a firm shell. Once the papier mâché is dry, use your imagination and decorate it to create a unique mask!
Making the Papier Mâché and Prepping the Face
- Sift the flour first if you want the papier mâché to be super smooth.
- Add more warm water if the mixture is too thick.
- You can use an old comic or magazine instead of a newspaper if you prefer.
- You probably won’t need a whole newspaper worth of strips, however, it is better to have too many than to run out while you are making your mask.
- Alternatively, use aloe vera gel instead of petroleum jelly.
- Make sure that your friend has their hair out of their face and tied back if necessary before you start applying the papier mâché.
Laying Down the Newspaper Strips
- Don’t worry about creating layers of newspaper strips just yet. Just focus on covering these areas of your friend’s face.
- Be careful not to block your friend's nostrils with newspaper as you work on their nose.
- As long as your friend can breathe comfortably through their nose, you can cover their mouth with papier mâché too if you prefer. This means that you will be able to cut out the mouth shape when the mask is dry.
- Provided that your friend can safely breathe and open their eyes, it’s better to make the openings in the mask slightly too small rather than too large. This is because it’s easy to cut the openings to size once the mask has dried.
- Don’t worry if there are overlapping sections of papier mâché.
Removing and Drying the Mask

- The mask won’t be entirely set just yet, as it needs to dry fully overnight.

- The mask may take slightly longer to dry depending on the humidity.
Adding Embellishments
- This is the easiest way to add wrinkles to your mask.
- Once the papier mâché layers are dry, your mask should feel firm and not flimsy. Add more layers if the mask feels too weak. [13] X Research source
- If your mask is just for display and is not going to be worn, you can cover the eyes and breathing holes with papier mâché if you prefer.

- Creating molds is useful when you want to add larger features to your mask such as horns, a beak, or a long nose.
- Wait until all of the extra layers have dried before decorating your mask further. This may take an extra 1-2 days depending on the weather and how many layers need to dry.
- There are plenty of design options for painting your mask. Chose bright colors if you are making a costume mask or skin tones if you are creating a realistic mask.

- You could also use fake teeth, a wig, ribbon, or washi tape to decorate your mask.
Expert Q&A

Reader Videos
Share a quick video tip and help bring articles to life with your friendly advice. Your insights could make a real difference and help millions of people!

- Make sure that your mask is completely dry before you begin decorating it. Otherwise, the papier mâché could be damaged. Thanks Helpful 5 Not Helpful 0
Things You’ll Need
- Newspaper, old comic book, or magazine
- Petroleum jelly or aloe vera gel
- Masking tape
- Acrylic paint
- Decorations such as wool, glitter, or feathers
- Craft glue or hot glue and hot glue gun
You Might Also Like

- ↑ https://thereformschool.net/2020/11/07/anything-can-be-a-mold-molding-objects-with-paper-mache/
- ↑ Amy Guerrero. Arts & Crafts Specialist. Expert Interview. 9 October 2020.
- ↑ https://craftcue.com/paper-mache-masks
- ↑ https://www.doc-developpement-durable.org/file/programmes-de-sensibilisations/economies_recyclage/papier_mache_PACE.pdf
- ↑ https://www.melbourne.vic.gov.au/SiteCollectionDocuments/SHP-Sep-20-Papier-mache-pig.pdf
- ↑ https://www.youtube.com/watch?v=FCiYNE_hmNg
- ↑ https://new.artsmia.org/virtual-open-studios/papier-mache-paste
- ↑ https://www.youtube.com/watch?v=xi-JoyMk6Is
- ↑ https://static.pbslearningmedia.org/media/media_files/7f0a9086-6b11-474f-b9c9-2ebfa69ced8e/57e4eb4e-2f58-4cce-b733-79d017198b89.pdf
About This Article

To make a papier mache mask, first cover your friend’s face in petroleum jelly so the papier mache doesn’t stick to them. Next, mix 1 cup of flour with 1 cup of warm water to make the paste. Then, dip strips of newspaper in the paste and apply them to your friend's face, making sure that each strip runs flat along their skin. You should also overlap each strip slightly to help the mask stick together. Once you’ve got 2 to 3 layers of papier mache across the entire face, let the mask dry for 2 to 3 hours. Speed up the process by having your friend sit in front of a fan. After the mask feels firm to touch, get your friend to scrunch up their face to remove the mask. Then, leave it in a well-ventilated area to fully dry overnight. On the following day, add extra layers of papier mache to enhance some of the features, such as the eyebrows, lips, or cheeks. For tips on how to paint or decorate your mask, read on! Did this summary help you? Yes No
- Send fan mail to authors
Reader Success Stories
Alexis Speakman
Oct 11, 2020
Did this article help you?
Candy Sunset
Feb 17, 2021

Featured Articles

Trending Articles

Watch Articles

- Terms of Use
- Privacy Policy
- Do Not Sell or Share My Info
- Not Selling Info
wikiHow Tech Help Pro:
Level up your tech skills and stay ahead of the curve
Trending Post: How To Paint A Glass Tile Backsplash With These Simple DIY Steps
How To Make An Easy Paper Maché Piñata

Learn how to make a DIY piñata using simple ingredients from home. You will be shocked at how budget-friendly this craft can be.

*Disclosure: I only recommend products I would use myself and all opinions expressed here are our own. This post may contain affiliate links that at no additional cost to you, I may earn a small commission. Read our full privacy policy.
There is no better party activity than a piñata. We have convinced our son that a family party in our new playset with cupcakes would be the perfect way to celebrate his birthday. What little kid doesn’t love hanging a piñata outside and finding all the customized treasures?
Why not just buy a piñata?
I had a few in my online shopping cart but decided to save $20+ and make my own DIY piñata. Here is a step-by-step tutorial on how to make a homemade paper maché piñata . The best part about this easy DIY project is that it is budget-friendly. You probably already have most supplies in your pantry.

Ways To Make A Simple Piñata
- out of a cereal box
- use a paper bag as the base
- use an old cardboard box
- traditional paper maché paste and crepe paper
- mini piñatas out of cardboard tubes
- create a base like large numbers out of bendable cardboard strips
Design Your Piñata Before You Start
Once you have decided on your piñata design you need to construct your base before making your paper mache paste.
For our simple Easter egg piñata that meant blowing up the balloon and prepping our workspace. This will take more time if you are using something other than a balloon for your base.
I asked my son what he wanted, and he actually said the easiest thing possible…An Easter egg piñata. This basic shape could be made with a balloon and easy DIY paper maché paste.
Other DIY piñata ideas
Unsure of the piñata you want to build? Our DIY friends make them all the time. We will be consulting this list of cool piñata ideas for our next birthday party.

Recommend Supplies For Paper Maché Recipe
- I.5 parts water
- 1 part flour
- Tablespoon of salt
- Newspaper or old brown paper bags
- Colored Tissue Paper or paint (optional)
- Balloons ( this pack of balloons has also been a hit for extra games around our house)
*You can use cardboard or a different base than a balloon.
How To Make Homemade Paper Maché Paste
Step 1: add water to flour.
Pour flour into the bowl and slowly add water.

Step 2: Completely Mix Together
- Stir or whisk until it is not chunky at all.

Step 3: Add A Pinch Of Salt
Adding salt helps preserve what you are making.
How To Make A Piñata From A Balloon
Step 1: cut strips of newspaper or a brown bag.
You will want to precut your newspaper or old paper brown bags into strips of paper about 1 inch wide. This can vary depending on your project.

Step 2: Blow Up The Balloon
If using a balloon, blow it up to the desired size and place it in a bowl. This will help you have a stand to work on. If you are creating a cardboard base, then you would just get that ready.

Step 3: Start To Add Paper Strips
Dip a whole strip of newspaper into the flour mixture. Pull it out while keeping it flat.
This allows the edge of the bowl to take some of the excess paper mache off. You can also use your fingers to take extra goop off.

Step 4: Add Strips To The Balloon
Keep strips flat and place them on the balloon or base. Rubbing it to get flat.

Step 5: Continue Covering The Balloon
Overlap strips in different directions. You do not want the paper mache strips to all go the same way.

Step 6: Continue Adding Strips
Repeat this until you have about 3 layers .

Optional Step: Add Tissue Paper For Color
If you want to add a base color to your homemade pinata, then you can also carefully add tissue paper on top of the newspaper . You can try to do it while it is wet or revisit and add color after it dries.

Step 7: Let Piñata Fully Dry
Your piñata base may take up to 24-48 hours to completely dry.
Optional Homemade Piñata Decorating Steps
Paint dotters or paint.
Use paint dot makers to have little ones help you add decorations as we did after our homemade pinata dried.

Add Extra Colors Of Tissue Paper
Cut tissue paper in a fringe and glue it on to give it a more traditional pinata feel.

Add Texture
Cut some squares of tissue paper, wrap them around the end of a pencil and dip them in glue. Add the tissue paper to the pinata. In the image below, we are making a simple textured tissue paper heart craft .
This will give that fluffy texture. I think I will probably try this the next time I need to make a pinata, but it probably would be pretty time-consuming.

How To Turn Balloon Into A Hanging Piñata
Step 1: pop balloon.
First, pop the balloon. I did cover the whole balloon except for the knot.
Step 2: Cut Door
Cut out a shape on the top big enough for you to drop your prizes into. Use an Exacto knife to cut a square flap out of the top . Do not cut the whole shape. Cut 3 sides so that the top of the pinata will flip open.

Step 3: Fill With Prizes
Drop in the prizes, homemade crafts such as these shrinky dink charms or small toys. Make sure that your piñata is strong enough to support whatever you are putting in. We added suckers, small toys, airheads, and my favorite little spiky balls to ours.

Step 4: Add Hanging String
Punch or cut two small holes far enough away from the opening and add a string or ribbon .

Step 5: Close The Lid
Flip the cut shape back on.

Step 6: Add Paper Maché and Paper Strips On The Seam
Make a small amount of homemade paper maché paste. Reapply flour paper mache on top of the cut seams.

Step 7: Add Color To The Seam
Add colored tissue paper back on top using paper maché paste.

Step 8: Let Dry
Let the paper mache strips dry and get ready to have some fun!
Hang Your Homemade Piñata
We decided to hang ours near our new treehouse and rock wall. Surprisingly, ours held up for quite a few swings. I was surprised at how strong the 3 layers of paper mache were. My kids loved that they knew we had made it ourselves and couldn’t wait to see what was inside.

They also really thought it was a mystery about how things got inside. While they helped with the paper mache part, they didn’t get to see me put the toys and candy inside. They were happily surprised by this homemade piñata!
Tips and Tricks For Making A Piñata
- Make sure that your homemade piñata structure is strong enough to hold what goodies you put in.
- Use a bowl to help prop up balloons or round objects.
- Find ways to add details with the whole family (like using paint dotters )

How-To FAQs

3 layers will make sure that your piñata is strong enough to hold the goodies you put inside. Make sure you criss-cross the strips when applying them to the balloon.
Classic paper maché consists of flour. However, we have had success mixing 1 part non-washable glue and 1 part water together for a flour alternative. Make your strips out of thinner paper or even paper towels for the best results.
If you are using a box as a base, you would want to open parts of it and then retape it together with masking tape. This will make it easier for your children to smash.
When you add more paper maché you are making the piñata very strong. You could modify this step by only taping the lid shut. However, your piñata may easily break (which may be a good thing depending on the age trying to break it open).
Piñatas To Buy
Now, if after you read this, you decide you just want to spend the money and get a pinata, here are a few that I did consider buying.
- Race Car Pinata – Seemed to be the cheapest with the highest rating.
- Llama Pinata -I really would have had to think about getting if this was for my daughter
More Family-Friendly DIY Tutorials For Your Next Party
- DIY Anniversary Party Ideas that Will Save You Money!
- Easy and Inexpensive Birthday Treat Bag Ideas
- Fun DIY Prize Punch Board Game

Follow us on Pinterest , YouTube or Facebook for more DIY inspiration!
I hope you enjoy making memories with your DIY paper maché piñata! We know our family did.
Did you have fun making this craft with your family? Make sure to leave a 5-star ⭐️ ⭐️ ⭐️ ⭐️ ⭐️ review in the comments !

How To Make A Piñata
- ▢ Bowl
- ▢ Utility Knife
- ▢ Scissors (our favorites)
Recommended Supplies
- ▢ Newspaper Strips
- ▢ 1 cup All-Purpose Flour
- ▢ 1.5 cups Water
- ▢ Tablespoon Salt
- ▢ Balloon
- ▢ Paint Dotters Optional
- ▢ Colored Tissue Paper Optional
- ▢ Fun items or candy to fill your piñata
Instructions
How to make paper maché paste.
- Pour flour into a bowl and slowly add water.
- Add salt (this helps preserve what you are making).
How To Make A Piñata Out Of A Balloon
- You will want to precut your newspaper into strips of paper about 1 inch wide . This can vary depending on your project.
- If using a balloon, blow it up to the desired size and place in a bowl.
- Dip the whole strip of newspaper into the flour mixture. Pull it out while keeping it flat. This allows the edge of the bowl to take some of the excess paper mache off. You can also use your fingers to take extra goop off.
- Keep strips flat and place them on the balloon or base. Rub them to get flat.
- Overlap strips in different ways. You do not want the paper mache strips to all go the same way.
- Repeat until you have 3 layers.
- Optional: You can use tissue paper to add color, paint the paper maché or use a variety of ways to finish your paper maché piñata.
- Let paper maché fully dry.
Adding Treats Inside The Piñata
- Once the piñata is dry, cut open the top and place party treats inside.
- Cut holes on side and string ribbon across before closing.
- Re-paper maché the top after attaching a ribbon or string.
- Decorate as needed and enjoy your DIY piñata.
- Place a balloon in a bowl when trying to paper maché.
- This simple paper maché recipe can be used for all sorts of DIY art and easy craft projects.
- Instead of using a balloon for your base, you could make a base out of cardboard or a box to create any shaped piñata.
- Make sure to add three layers of paper maché to your balloon . This will make it strong enough to hold your weight items.
- If young children are having a hard time cracking the piñata, cut a small slit to help them break the piñata apart.
Erin Nutter is the DIY enthusiast, writer and photographer behind TheDIYNuts.com. She loves sharing her passion for do-it-yourself projects along with her husband, Eric. As an artist, mother, and lover of all things DIY she hopes to inspire you to be creative to make a life and home you love.
Leave a Reply Cancel reply
Your email address will not be published. Required fields are marked *
I accept the Privacy Policy
This site uses Akismet to reduce spam. Learn how your comment data is processed .
I used to make paper mache as a kid and this looks super fun to make!
Hi Hannah! Yes, my kids did enjoy getting pretty messy creating this DIY pinata. They had even more fun cracking the homemade pinata open!
You have just given me a great idea! We are still on lockdown and I was thinking of what to do to celebrate when we are finally back to the new normal. I’ll make a giant pinata!! It looks so simple and I’m sure it will be fun to do!
Hi Millie. Yes, our kids loved making the homemade pinata (even though the paper mache was pretty goopy). And of course, they love smashing it! It really made my son’s birthday (while being safe at home) special.
This is a great diy! Thanks for the steps. Piñatas are expensive so being able to make one is great!
Hi! Yes, we love being able to make things ourselves. A DIY pinata is a perfect solution for something you are just going to smash anyway!
Easy Paper Mache Mask

Introduction: Easy Paper Mache Mask

Using paper mache to create custom masks is an age old tradition, and there are a lot of ways to do it. In this Instructable I'll show you how to use wire mesh and paper strips to create a base that is perfectly fitted to your face. This is a really simple technique that produces some pretty great results.
I'll also show you how I added details to my mask by sculpting over that base with paper mache clay. Paper mache clay is a cheap and awesome air-dry sculpting material that you can either make, or buy pre-made. To learn more about the different kinds and how to make it, check out my free Paper Mache Class .

Step 1: Tools and Materials

- Newspaper, newsprint or blue shop towels
- All purpose white flour
- GlueAll , or wood glue
- Masking tape
- Strong twine, ribbon or elastic
- Wire sculpting mesh
- Mixing bowls
- Measuring cups and spoons
- Airtight container or ziplock bag
- Paint brushes
- Cloth tape measure
- Pencil and paper
- Drop cloth or other plastic cover
- Hand mixer (optional)
- Store bought CelluClay or Creative Paperclay or make your own clay
- Sculpting tools (optional)
- Acrylic paint
- Gesso or Flexbond primer
- Cordless drill (optional)
- Acrylic medium, or other sealant
- 2-3 days working + drying time
Step 2: Using Mesh to Create a Mask Armature

To create the base of our mask we are going to use sculpting mesh to form the shape which will be covered with paper mache strips. This kind of wire mesh is sold at art supply stores in various densities. It is very formable an stretchable, and used to create the bases of a lot of sculptural projects. I bought the mesh with the smallest holes because the texture is the easiest to cover up, but any will really work in this situation.

To start creating your mask, first take some basic measurements of your own face or whoever you are making a mask for with your cloth measuring tape.
Measure top of forehead to chin, then measure down to the eyes and draw a perpendicular line. Mark the bottom of the nose, and the distance between the eyes, then the distance from ear to ear.

Around this T draw the shape of your mask, thinking about where the shape will sit in relation to the parts of your face. This will be the base, so you don't need to add details, just create the basic shape.

Cut it out of the paper and hold it up to your face to see if you like how it looks. Remember that it will bend and fit more snugly to your face when you make it in the wire, but you can get an idea of how it will look this way.

When you have a shape that you like, lay it on top of your mesh so it is parallel to the grain of the mesh, and use a sharpie to trace around the outline.

Cut the shape out with a pair of craft or serrated scissors. Don't cut out the eye holes just yet. The edges of the mesh can be poky, so be careful not to stab yourself as you are cutting.

Use your hands to carefully begin to shape the mask. I added curves to the edges of the horns and raised ridges to the side fins.

To shape the mask to your face, hold the mesh in front of your face with your index fingers right over the eyes. Press the mesh onto your face, making indentations where your eyes are, moulding over the ridge of your nose, and curving around your forehead and cheeks.

Take the mask off, smooth out any bumps, and adjust the shape so it is the same on both sides. Keep taking the mask on and off and fiddling with it until you have a shape you like. Then use your scissors to cut out the eyes. Before you try the mask on again, make sure you bend the edges of the mesh out slightly around the eyes so it doesn't poke you.

Step 3: Adding Paper Strips

Once you have your mask armature formed, cover it with paper strips. You can use either glue or flour paste here, whichever you prefer.
Start by covering the front of the mask with strips. Curve the strips to contour around the shape of the mask and tear them off so they end right before the edge.

Cover the whole front of the mask with two layers of strips, and let it dry enough so the strips are sticking to the front and holding their shape.

Then flip the mask over and add two layers of strips to the back in the same way.

Once this layer has mostly dried, you can start taking short strips and wrapping them around the exposed edges of the wire. They should stick to the dried paper on both sides. Use narrow strips on curved areas to create a smooth edge.

To cover points and corners, fold a strip over on itself like this:

Step 4: Using Paper Mache Clay to Add Details

Once your mask base has dried thoroughly, you can use paper mache clay to add some details to it if you like. Because the clay can be sculpted and formed to create any shape, it is a much more accurate way to add small details on top of an a paper mache base than trying to use the strips themselves.
You can use either the homemade clay or one of the store-bought paper clays for this. I tried the home made clay on one mask and the Creative Paperclay on another so you can see the difference. Check out my free Paper Mache Class to for more info about paper mache clay.
Either way, all you need to do is take pieces of the clay and stick it onto the dry paper mask. Smooth the edges of the clay into the paper to blend it and give it a good grip. If the clay seems dry and isn't sticking well, rub a little water on the surface of the clay that you are attaching to the mask.

To help smooth the clay you can also wet the surface slightly and rub it with your fingers. You can also use sculpting tools or stamps to create texture or details.

On these masks I used the clay to add some facial details to the mask I was creating to make it look a bit more dragon-ish. You can see the details I created with the home-made clay in the first photo and the Paperclay in the second. As you can see, it's a little harder to get smooth details with the homemade clay.

You could add as many details as you want, and even cover the whole mask with clay. But keep in mind that the more clay you add, the heavier the mask will be. Covering the whole mask with a thin layer of clay will let you create a really smooth surface when combined with sanding though.
Step 5: Sanding

If you've used the store bought Paperclay, you can easily sand it to smooth and shape it once it has fully dried.
I used 100 grit sandpaper for a first pass to shape the clay, and 120 for a second smoothing pass. if your project has areas where the clay meets paper strips, sand these edges so they blend in smoothly.

The clay in the first photo is un-sanded and the clay in the second is sanded.

Use a large brush or a towel to brush off the paper dust when you are done.

The homemade clay is harder and more fibrous than the store-bought clay, so it doesn't sand as well. If you are using this clay and having a hard time sanding, try using a sandable smoothing compound first then sanding over it.
Step 6: Using Smoothing Compounds and Primers

Smoothing compounds like gesso and Flexbond are helpful to create a smooth finish on paper mache strips or clay before you paint. Flexbond is a lot like wood glue, but creates a smoother finish and can be wet-sanded after it is dry if you want an even smoother finish. Gesso sands even more easily, so it is the best choice of smoothing compound if you are working over a base that can't be sanded and want to create a really smooth finish.
I used Flexbond on both my un-sanded home made clay and my sanded Paperclay so you can see what a difference the sanding makes when I paint it later.
Put a little Flexbond in a cup and dilute it with some water. Use a medium sized brush to apply it all over the mask in a even layer. It can have a tendency to run and create drips, so use your brush clean up any dripping areas before you leave it to dry.

Once the first layer has dried, which shouldn't take more than an hour or two, add a second coat. You can continue adding layers until your mask is as smooth as you want it to be. If you plan on wet-sanding your Flexbond, you should add at least 4 coats.

Step 7: Painting

Once you have sanded and primed you can paint your mask with whatever colors and patterns you like! If you are making a mask that is supposed to represent some specific creature or style, you might want to look up some reference images to help inspire you.
I think acrylic paints are the best for this type of painting. They dry fast, can be mixed easily and are relatively inexpensive. I particularly like using metallic colors or a combination of metallic pigment powder mixed with acrylic medium.

Mix your paints to get a color you like, then apply enough coats to your mask to cover the details of the newspaper and clay. If you are using a light or bright color, you might want to prime your mask with a white paint or primer first.

To create blended or shaded effects, mix a lighter color and apply it over the base coat, using the base color to blend the two at the edges. It can really enhance the look of a piece to add shading in concave areas and highlights in raised areas.

Use different brushes to create finer details.

Step 8: Sealing
Once you've painted your mask, you can give it some extra protection or a different finish by covering it up with some kind of sealant like an acrylic medium, shellack, or something similar. This is an optional step, but a good one if you think your mask is going to get a lot of wear or be outside often.
Step 9: Disguise Yourself!

Now that you've finished your awesome mask, add some string or elastic so you can wear it, or hang it on a wall for display. Since I didn't make holes in the mask earlier, I drilled two holes on each side with a cordless drill, keeping the holes about 1/2" apart. Then I threaded some sturdy string through the holes and threaded it behind my head, and became a new creature!!
This wire mesh and paper mache combination is a good technique you could use to create a lot things. If you've made a version of this project, feel free to post and I Made It in the comments section below!
And, to learn more about paper mache, check out my free Paper Mache Class .
Recommendations

Puzzles and Games Contest

Water Contest

Outdoor Life Contest

- How to Make a Paper Mache Mask
Gary Ombler/Getty Images
- Skill Level: Kid-friendly
Help your child make a mask using their own face as a mold. You can also make a mask using a balloon as a base. Not only can this be a fun and educational craft, but it is also a great way to make decorations and accessories for Halloween. To allow ample drying time, you will need a few days to complete this project.
To avoid a big mess, cover your work surface well with newspaper laid on top of wax paper, freezer paper, or even on an old tablecloth or shower curtain.
What You'll Need
Equipment / tools.
- Aluminum foil or a round balloon
- Plastic wrap
- Paper mache paste
- Acrylic paint
Instructions
Make a mold of the face or balloon.
Tear off a piece of aluminum foil at least twice as long as the subject's face, and fold it in half. Use the subject's face as a mold by gently pressing the double layer of tin foil over it. Wad up the newspaper and place it inside the curved section of the foil mold and lay it on your work surface.
If you prefer to use a balloon as a mold for your mask, start out by blowing up a balloon and tying it closed. Find a bowl or cup your balloon can sit on while you work on it. Completely cover the cup or bowl with plastic wrap so the paper mache does not stick to it.
Tear the Newspaper Into Strips
Tear newspaper into strips about 1 or 2 inches wide and between 4 and 8 inches long. Choose a paper mache recipes and make it, and then follow step-by-step directions to cover your foil mold or balloon.
Cover the Mold
Cover the foil mold with at least three or four layers of paper mache, letting it dry completely between layers. If you are working with a balloon, only cover half of the balloon with paper mache unless you want to make an entire head.
If you are working with a foil mold, make sure not to press too hard or it may lose its shape.
Make the Features
Once you have on one layer of paper mache and it is dry, use various supplies to make dimensional facial features on your balloon. You can make a nose, ears, thick eyebrows, lips, etc. Use cardboard, newspaper, foil, or other items . Use masking tape to hold everything in place. Once you have created all the facial features on your balloon mask, continue to add three or four more layers of paper mache.
Finalize the Mask
Once the paper mache is dry, the mask can be painted and decorated however you like. If you used a balloon base, pop the balloon and remove any loose pieces. Cut out eye holes before you decorate it and punch holes on either side to add ribbon or elastic to fit around your head. Use a variety of craft supplies to add some personal touches to your masks, such as yarn, fabric scraps, beads, glitter, and paper—your imagination is the limit!
More from The Spruce Crafts
- How to Make Papier-Mache Bowls
- Paper Mache Paste Recipes
- How to Make a Paper Mache Pinata
- How to Make a Paper Mache Globe
- Paper Mache Tips and Hints
- Free Mardi Gras Mask Templates
- How to Make a Paper-Mache Volcano That Erupts
- How to Make a Balloon Arch
- What Is Papier Mâché?
- 4 Simple Jewelry Cleaners You Can Make Yourself
- How to Make Paper Mache
- How to Make a Clay Volcano
- How to Make Cooked Paper Mache Paste
- How to Use E-Z Water to Make Water Features for Miniature Models
- How to Recycle Paper and Make Your Own Handmade Paper
Here's How to Transform Your Home into the Spookiest Haunted House
Your neighbors will be scared—and impressed.

Every item on this page was chosen by a The Pioneer Woman editor. We may earn commission on some of the items you choose to buy.
You're probably wondering how to turn your home into a haunted house. Where do you even begin? Or end , for that matter? How do you make it fun for all ages, without boring the older kids and adults? And how do you go all out, without breaking the bank?
It all might seem a bit overwhelming, but we checked in with a couple of designers who have been constructing haunted houses for years. Ahead, you'll find their best ideas for how to design a haunted scene in your home and backyard—nothing too elaborate, don't worry—along with recommendations on where to find props and decorations. So whether you've been hosting your own haunt for ages and want to level up or you're ready to give those trick-or-treaters a good scare for the first time, this guide will help you design and make a haunted house that's the hit of the neighborhood!
Can you make your own haunted house?

The short answer is yes! However, it helps to first decide how much money you want to spend as well as how big and elaborate you want to get before you start the actual decorating. If you want to make a haunted house kids (and their parents) will be talking about for years, begin planning it early, way before Halloween.
"I'm thinking about it 24-7-365," says Angela Colone, who's been an actor and designer for professional haunts including Screams at the Beach , in Georgetown, Delaware, and 301 Devil's Playground in Galena, Maryland. "I'm always looking at Facebook Marketplace to see if anyone is selling cheap props or things that they're getting rid of... I also look at yard sales and thrift stores. I'm always trying to pick up stuff."
Kate Pearce , an interior design blogger and content creator from Chicago, Illinois, who has long created spooky Halloween scenes based on thrift stores finds, also advises searching secondhand shops. "My biggest piece of advice would be to go to the thrift store and explore the entire thing, not just the Halloween aisle," she says. "Thrift is cheap, and therefore not a huge financial commitment, so you can really have fun and let your mind run wild."
Otherwise, you can cut costs by buying one professional prop and using it as a guide for making your own version of it. For example, when Colone was creating a barn scene with a spider's nest, she purchased one spider and fashioned the rest from papier-mâché and spray paint, hanging them from the ceiling with fishing line and on a dollar bag of Halloween cobwebs.
"It was really inexpensive," Colone says. "Papier-mâché is pretty awesome and it's disposable, so you don't have to hold on to it the next season if you don't want to. And it's the kind of craft you could make with your own kids."
How do you turn a house into a haunted house?
Let's start at the beginning. If you're building a haunted house that you want to appeal to younger kids, don't make the entrance too scary. You can set a mood with fog machines and corn stalk décor , but make sure the area around your door is open and inviting, rather than claustrophobic—it should be well-lit, too. You also want to keep the scenes you create inside of your home illuminated, so kids can see everything and the lights aren't directly focused on something scary.
"With kids, it's more about enabling them to look openly at everything," Colone says. "Usually for an adult haunt, you want it to be very chaotic. You want the fear of who's going to jump out now and what's coming around the next corner. But children need to see everything and be open to it. You want to allow them to come into your scene. You don't want to push your scene on them."
Speaking of scenes, Colone has a few ideas for sets and props the kids will love:
Cut a large hole in a refrigerator box to make a ticket booth. Dress one of your actors as a a clown and tuck them away at the ticket window. Offer carnival games for kids to try, like a bean bag toss , mini bowling , Pick a Duck or others. Bubbles drifting through the scene give it a festive feel, especially if they're scented like cotton candy !
Stock shelves with children's books you find at secondhand stores. Dress one of your actors like a wizard, who allows the kids to pick a book to take home with them. You can also make simple wands for take-home gifts. Tie twine on one end of a stick, and glue or tie faux gems on the other end of the twine.
Buy a few hay bales, pumpkins and corn stalks and decorate a room with them. Spread hay on the floor and add spider's nests in the corners of the room. Dress an actor like a scarecrow in simple makeup and a costume. You could also take this idea outside and easily make a haunted barnyard.
What are some tips for a kid-friendly haunted house?

After all, the idea is not to give kiddos nightmares, but to entertain them.
Use makeup rather than masks on actors.
"Masks can be a little too scary for some kids because they don't see a human behind it," Colone says. "If they don't see a human face, it's hard for them to approach."
Speak in a normal voice.
"When we do an adult haunt, we like to get creative with our voices and our tones, whereas a child may not like that," Colone says. "Instead, we talk to them in our normal voice, and we let them know they're welcome to come in and look around."
Give them something to take home .
According to Colone, from star or bug stickers to cardboard cut-outs of tombstones they can decorate at home, "kids like to have something to take with them that isn't just candy."
Engage more than one sense.
"What I've noticed in my years doing this is that both children and adults want to smell, feel, and even taste," Colone says. "For example, we've used cake batter , so they could smell that it was sweet, but the texture was almost like brains... and obviously things like the dirt pudding cups with the gummy worms in it."
How do you make a creepy haunted house?
If you want older kids to have as much fun in your haunt as the young ones, you're going to have to give them a satisfyingly creepy experience. Consider constructing different paths in your house, and giving your guests the choice of which ones they want to take: less spooky or seriously spooky. "Sometimes, it's nice to have multiple crossroads because the kids can say that wasn't that scary, I want to try a scarier one," Colone says. "So, that way, you're breaking it up and letting them choose what they want to see."
If you don't have enough rooms in your home to build that many individual scenes, you can construct walls with white sheets and even spray paint them with background scenery if you're feeling artistic. On the spooky path, use a bit more blood, full face Halloween masks and maybe even a ghoul or two popping out of hidden spaces. Decorate whole rooms when you can, like this killer dining room idea from Pearce, which utilizes items she found in the thrift store.
Put up a scary portrait.
Buy an old painting, poke holes in it and paint fake blood dripping from the holes. Extra points if you use the eyes for holes. "This same idea could be applied to a cheap portrait print that you don't feel bad poking some holes in," Pearce says.
Hang some doll heads.
Buy some creepy old dolls, pop their heads off and hang them with fishing line from the ceiling at different heights.
Sit a skeleton down.
If you have a skeleton handy, sit it at the dining room table. Pop off a bunch of old Barbie-sized doll heads and place them in a Halloween bowl with a spoon in front of the skeleton. It looks, says Pearce, "like the skeleton is eating a bowl of Barbie heads like cereal."
How do you make an outdoor haunted house?

Give your guests a fright before they even cross your doorstep by setting up a spooky scene in your front or back yard. We've got tons of ideas for store-bought and DIY outdoor Halloween decorations , including Halloween inflatables that will make a big scary statement and Halloween animatronics with glowing red eyes and creepy catchphrases.
And you know all those spooky Halloween party themes you've been brainstorming? They'll work perfectly for a themed haunted house, too! For her part, Colone likes creepy camping scenes. "Spray paint a sheet with Halloween scenes and toss it over an old tent," she says. "Kids can crawl through the tent and you can have an actor tell camp fire stories on the other side of it." Instead of lighting a real fire, stay safe with a faux campfire you can purchase or DIY from cardboard.
The most important thing to remember when creating your haunt is "to let your imagine go and have fun," Colone says. "It's all about how you want to make your haunted house."
.css-b8xe64:before{margin-bottom:0.625rem;height:2rem;content:'';display:block;background-image:radial-gradient(circle at 15px 0, #44ABA5 9px, #44ABA5 15px, rgba(255,255,255,0) 16px);background-repeat:repeat-x;}@media(max-width: 48rem){.css-b8xe64:before{margin-left:-0.99rem;width:100vw;-webkit-background-size:30px 16px;background-size:30px 16px;}}@media(min-width: 40.625rem){.css-b8xe64:before{margin-left:0;width:100%;-webkit-background-size:30.659px 16px;background-size:30.659px 16px;}} What You'll Need For Your Haunted House

Fog Machine with 13 Colorful LED Lights

Hanging Posable Skeleton

Halloween Inflatable

Artificial Paper Fire
Jill Gleeson is a travel journalist and memoirist based in the Appalachian Mountains of western Pennsylvania who has written for websites and publications including Good Housekeeping, Woman’s Day, Country Living, Washingtonian, Gothamist, Canadian Traveller, and EDGE Media Network. Jill is the travel editor for Enchanted Living. Learn more about her journey at gleesonreboots.com.
.css-1sq74k2:before{margin:auto auto 0.25rem;content:'';display:block;-webkit-background-size:contain;background-size:contain;background-repeat:no-repeat;}@media(max-width: 48rem){.css-1sq74k2:before{width:2.039rem;height:1.616rem;}}@media(min-width: 48rem){.css-1sq74k2:before{width:2.5rem;height:1.9rem;}}.loaded .css-1sq74k2:before{background-image:url('/_assets/design-tokens/thepioneerwoman/static/images/butterfly.svg');} Halloween 2024

Take a Bite Out of These Food Halloween Costumes

The Best Halloween Costumes for a Group of Three

20 Cute Costume Ideas for Fathers and Sons

Healthy Pumpkin Recipes You'll Feel Good About

If You Love Candy Corn, These Treats Are for You

25 Fun Halloween Breakfast Ideas

These Halloween Face Paint Ideas Are So Cool

30 Halloween TV Episodes to Binge This Fall

The Cutest Halloween Cookie Recipes

Bake A Boo-tiful Batch of Halloween Cupcakes

Sweet Treats to Make With Extra Halloween Candy
IMAGES
VIDEO
COMMENTS
Step 4: Add a layer of paper mache to the bowl. Dip a strip of newspaper into the paper mache mixture, saturating it completely. Slide the paper through your fingers to remove the excess paste. Place the paper strip on the covered bowl, smoothing it down with your fingers. Continue adding coated strips of newspaper to the bowl, overlapping them ...
Blend until it forms a smooth consistency. If it's too thin or thick, adjust accordingly. Add more adhesive base if it's too thin, water if it's too thick. 5. Find a surface you want to papier-mâché. Examples include a balloon, cardboard or a molded figure. [6]
Step 2: Make Your Paper Mache. Paper mache clay: Paper mache paste: Paste with no flour (and no mold!): Make paper mache with glue: Step 3: Apply the paste or paper mache clay to your form. Applying paper mache clay: Applying paper strips and paste: Step 4: Let your paper mache get dry all the way through.
Dip one piece of newspaper at a time into the paper mache paste. You want the newspaper strip to be saturated. Hold the saturated strip over the paste bowl and run it through your fingers to squeeze off any excess paste. Stick the newspaper strip over your form and smooth it down with your fingers. Completely cover your form with a layer of the ...
Slowly and carefully work your way around the bowl, pressing and releasing the paper. If it is really stuck, allow the bowl to dry more. Method 2- Pop the balloon. Then gently pull the balloon out of the bowl. (ph0to below shows balloon sticking to the bowl) TIP: If it sticks to the bowl ….
Tear your paper into small (around 1/2 inch is ideal) pieces. Place the pieces into a mixing bowl. Add two cups of boiling water to the paper, stirring in order to ensure that all the pieces are saturated. Let the mixture cool. Use a blender to smooth the mixture into a pulp.
Paper mache is a composite material involving paper pieces or pulp and originates from China. The Chinese would make helmets toughened with layers of lacquer while the Americans made paper boats. Today, paper mache is a fun craft that's appropriate for all ages and is even included in strategy video games like The Escapists .
Newspaper is thicker and so, tear it into much smaller pieces. Next, pour boiling water over the paper and let it sit for at least 2 hours (overnight if you used newspaper). The hot water will break down cellulose and turn your paper into pliable pulp. Drain the pulp into a cheesecloth and squeeze the excess water out.
Homemade: 1:1 (1 cup of flour to 1 cup water, or 1 part flour to 1 part water) Wallpaper: 1:1 (1 part wallpaper glue to 1 part water) Next, whisk the mache paste recipe using your paintbrush or a spoon until you reach a smooth consistency. Adjust the quantities if needed.
4. Let it dry: Allow your creation to dry completely. This may take a few hours or even a couple of days, depending on the size and thickness of your project. 5. Decorate and finish: Once your papier mache is fully dry, you can paint, varnish, or decorate it as you wish. Get creative and let your imagination run wild!
Combine flour/glue and water into the bowl and mix until desired consistency. When you begin to make your paper mache mixture, you will combine your two ingredients in a bowl until it reaches the desired consistency. If the mixture is thick, you add water. If the mixture is thin, you add flour or glue.
Tutorial guide video to learn how to make a paper mache in a simple way. Paper mache is easy to make and fun to sculpt with. A great way to recycle paper tha...
Here is the simple way to make great paper mache in about 2 minutes. Lots of Paper mache projects on my website:http://www.stormthecastle.comAbout my Channel...
Download Article. 1. Glue tissue paper over the newspaper. Adding a layer of tissue paper over the newspaper will create a more uniform color and this will make it easier for you to decorate your vase the way that you want. After the last layer of glue has dried, apply some more glue over the newspaper.
Place the flour and water into a large bowl. Use a whisk to mix the flour and water together. Continue mixing until the water and flour has formed a glue and is a batter-like consistency. [1] Sift the flour first if you want the papier mâché to be super smooth. Add more warm water if the mixture is too thick.
The papier-mâché paste is a simple mixture of flour and water, and you can use many items found around your house to make molds and forms for your projects. It's a great way to recycle. Some of these items can be used as bases for the papier-mâché object, while others can be used to add specific details to the project.
Transfer the pot to the flame and let the water boil for some time. In another bowl, combine 1/2 cup flour, 1/2 cup cold water, and 1/4 teaspoon salt. To make a thin paste, thoroughly combine them. Next, add the flour mixture to the boiling water and stir for 5 minutes.
If using a balloon, blow it up to the desired size and place in a bowl. Dip the whole strip of newspaper into the flour mixture. Pull it out while keeping it flat. This allows the edge of the bowl to take some of the excess paper mache off. You can also use your fingers to take extra goop off.
Papier Mache. Contains numerous Papier Mache, also known as Paper Mache, projects, tutorials and information on how to create your own Papier Mache paste. Includes Easter paper mache projects and thanksgiving paper mache projects as well as great ideas for papier.
How to Make DIY Paper Mache Paste in Minutes In this tutorial, we'll show you how to make DIY paper mache glue in minutes. Whether you're a seasoned crafter ...
Step 2: Using Mesh to Create a Mask Armature. To create the base of our mask we are going to use sculpting mesh to form the shape which will be covered with paper mache strips. This kind of wire mesh is sold at art supply stores in various densities. It is very formable an stretchable, and used to create the bases of a lot of sculptural ...
Learn how to make Mod Podge paper mache bowls the easy way! You can paint them any colors you like to match your decor. So simple! Skills Required: None. You can make paper mache with no previous ...
Make a Mold of the Face or Balloon. Tear off a piece of aluminum foil at least twice as long as the subject's face, and fold it in half. Use the subject's face as a mold by gently pressing the double layer of tin foil over it. Wad up the newspaper and place it inside the curved section of the foil mold and lay it on your work surface.
How to Make the No-Cook Paper Mache Paste. The no cook paper mache glue is a good choice for younger kids. When I made the tissue paper art globe with my grandson, we used the no-cook paper mache glue. He enjoyed putting his hands in the glue and putting the wet paper strips on the balloon.
This little Nemo fish is a great project for anyone wanting to learn the basic steps of Paper Mache. In the video I hope to pass along to you the basis for u...
macherandomhouse on July 2, 2024: "To make my own book cloth I use cotton fabric and premium printing paper because it's a little heavier. It is possible to skip this step but the glue might sip through the fabric and ruin the cover, so I rather be safe . I also think the white background helps the color of the fabric become more vibrant. ".
Let's start at the beginning. If you're building a haunted house that you want to appeal to younger kids, don't make the entrance too scary. You can set a mood with fog machines and corn stalk décor, but make sure the area around your door is open and inviting, rather than claustrophobic—it should be well-lit, too. You also want to keep the ...